STU Bank helps you borrow smarter. Learn more about our loan options available to you.
Get Started!Personal loans can help cover any type of borrowing need. Borrow money with a set plan to pay down debt.
Shop for a vehicle with confidence. Receive up to 100% auto financing with an STU Bank Car Loan.
Thinking about buying a home or renewing your mortgage? Apply for an STU Bank Mortgage Loan today.
This website is for demonstration purposes only. To learn more about OneSpan Sign, visit onespan.com/sign
Don't worry, this is purely for demonstration purposes. Fill out the Personal Loan form and discover how easy it is to integrate OneSpan Sign into your solution.
At a high level, the e-signature process is quite simple. The document to be signed originates in your application. It is then passed to OneSpan Sign and put into a transaction, where signers, signature locations, and other properties are defined. Once completed, the transaction is sent to your recipients. After signing is completed, the e-signed documents and audit trail can be downloaded and managed within your application.
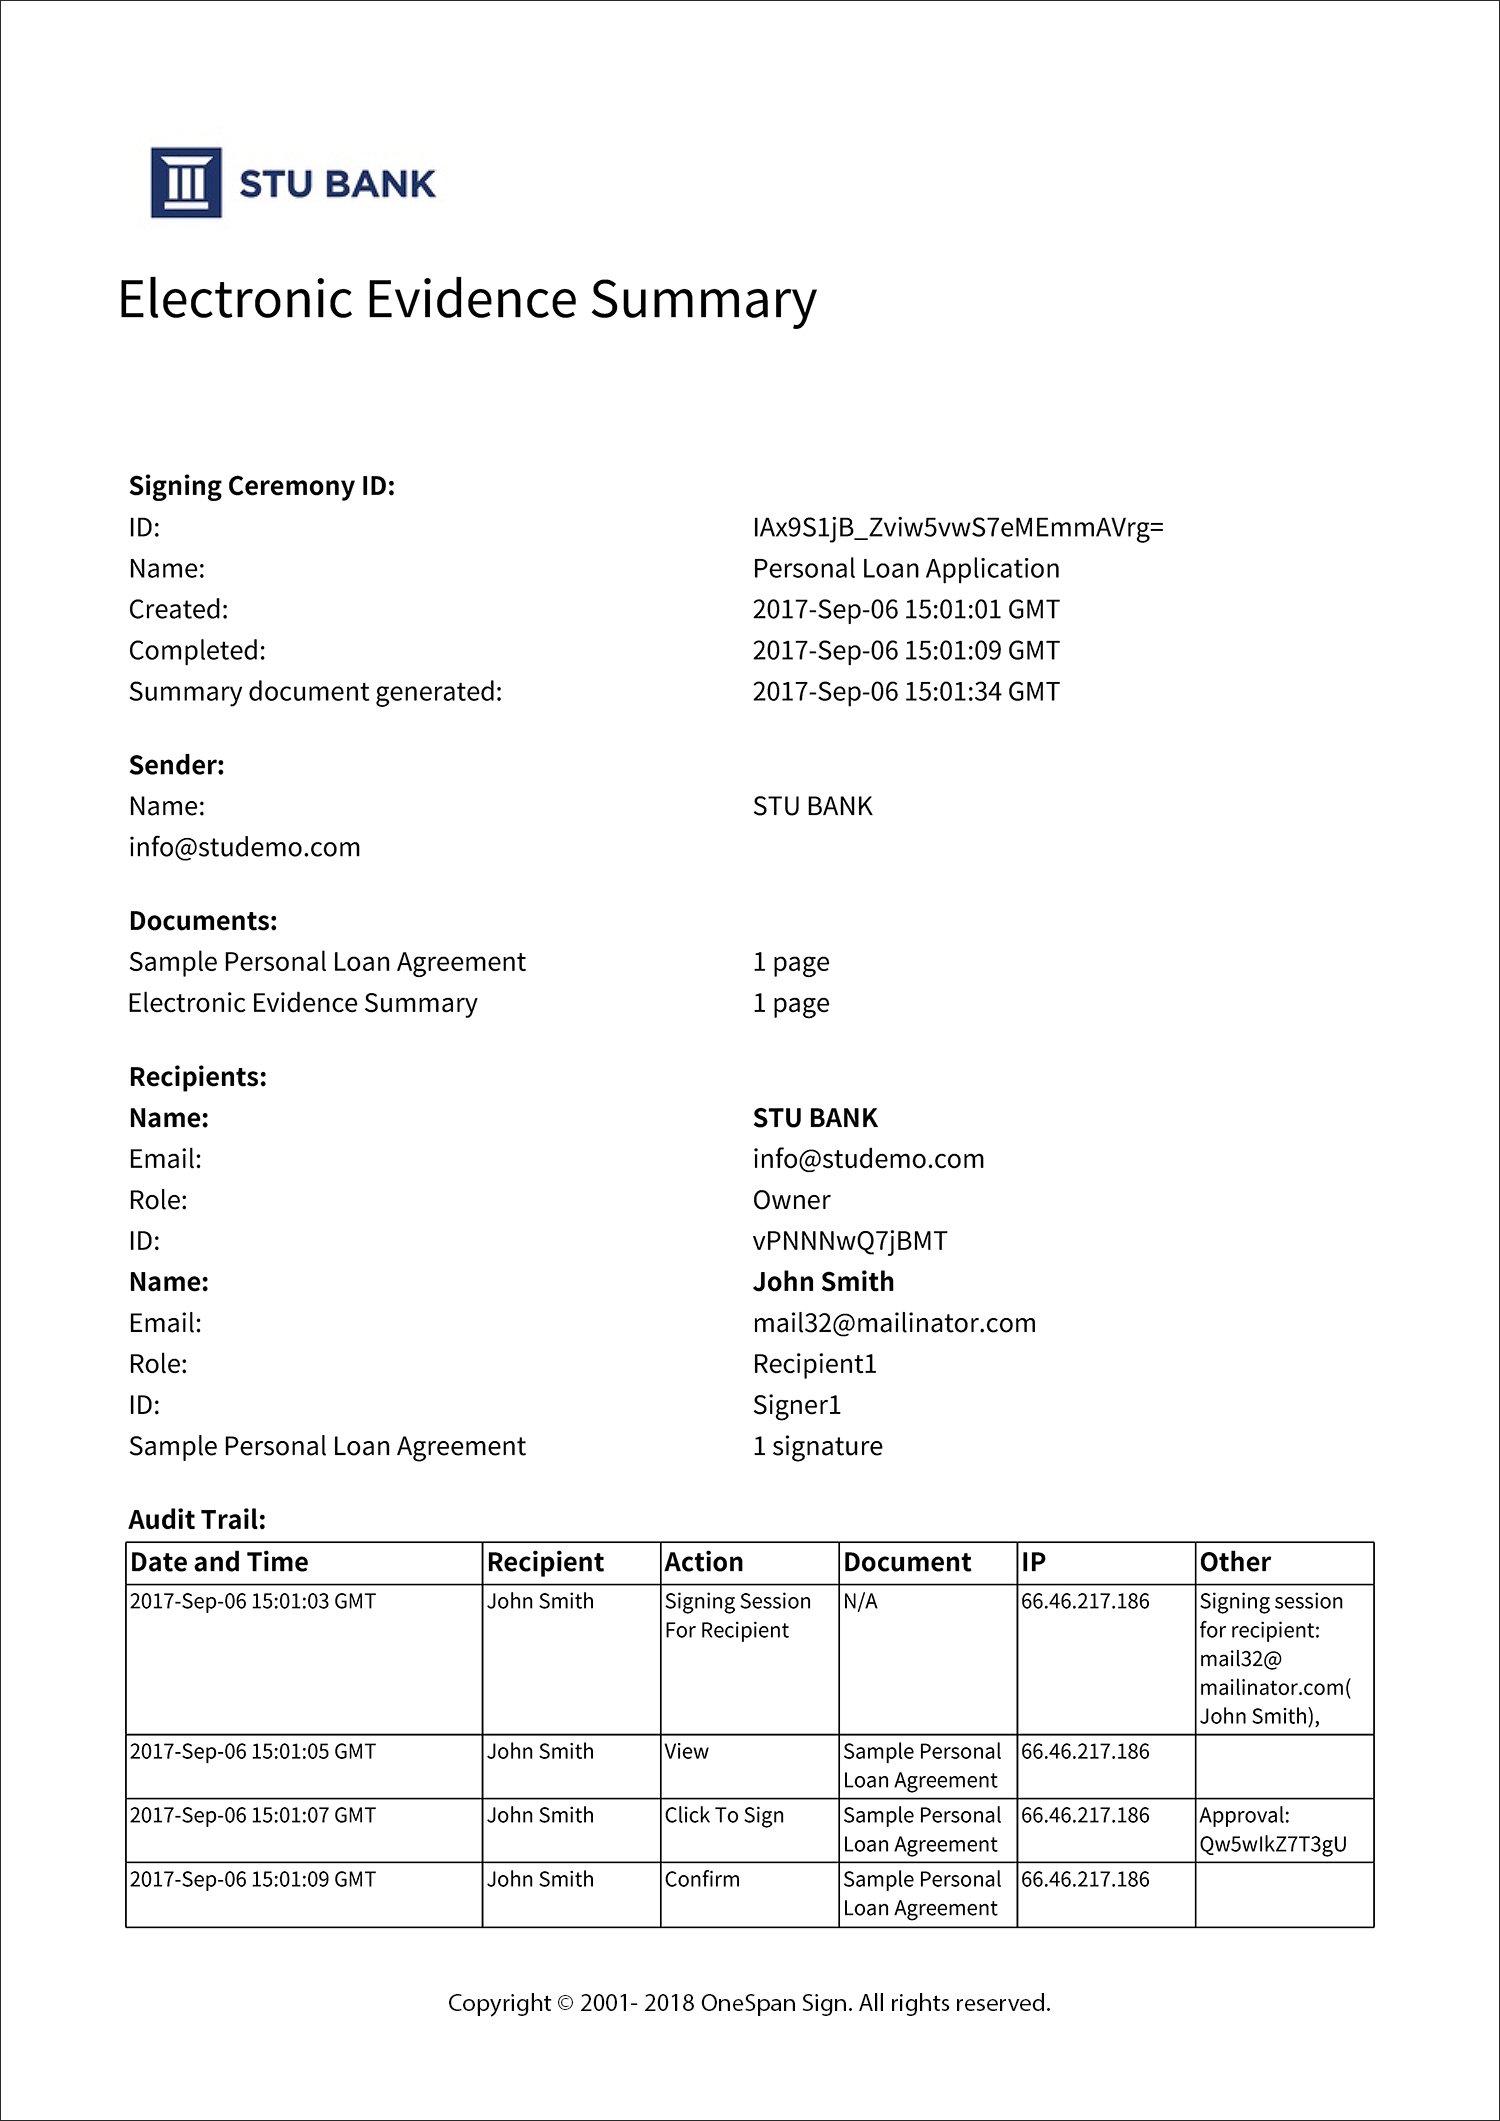
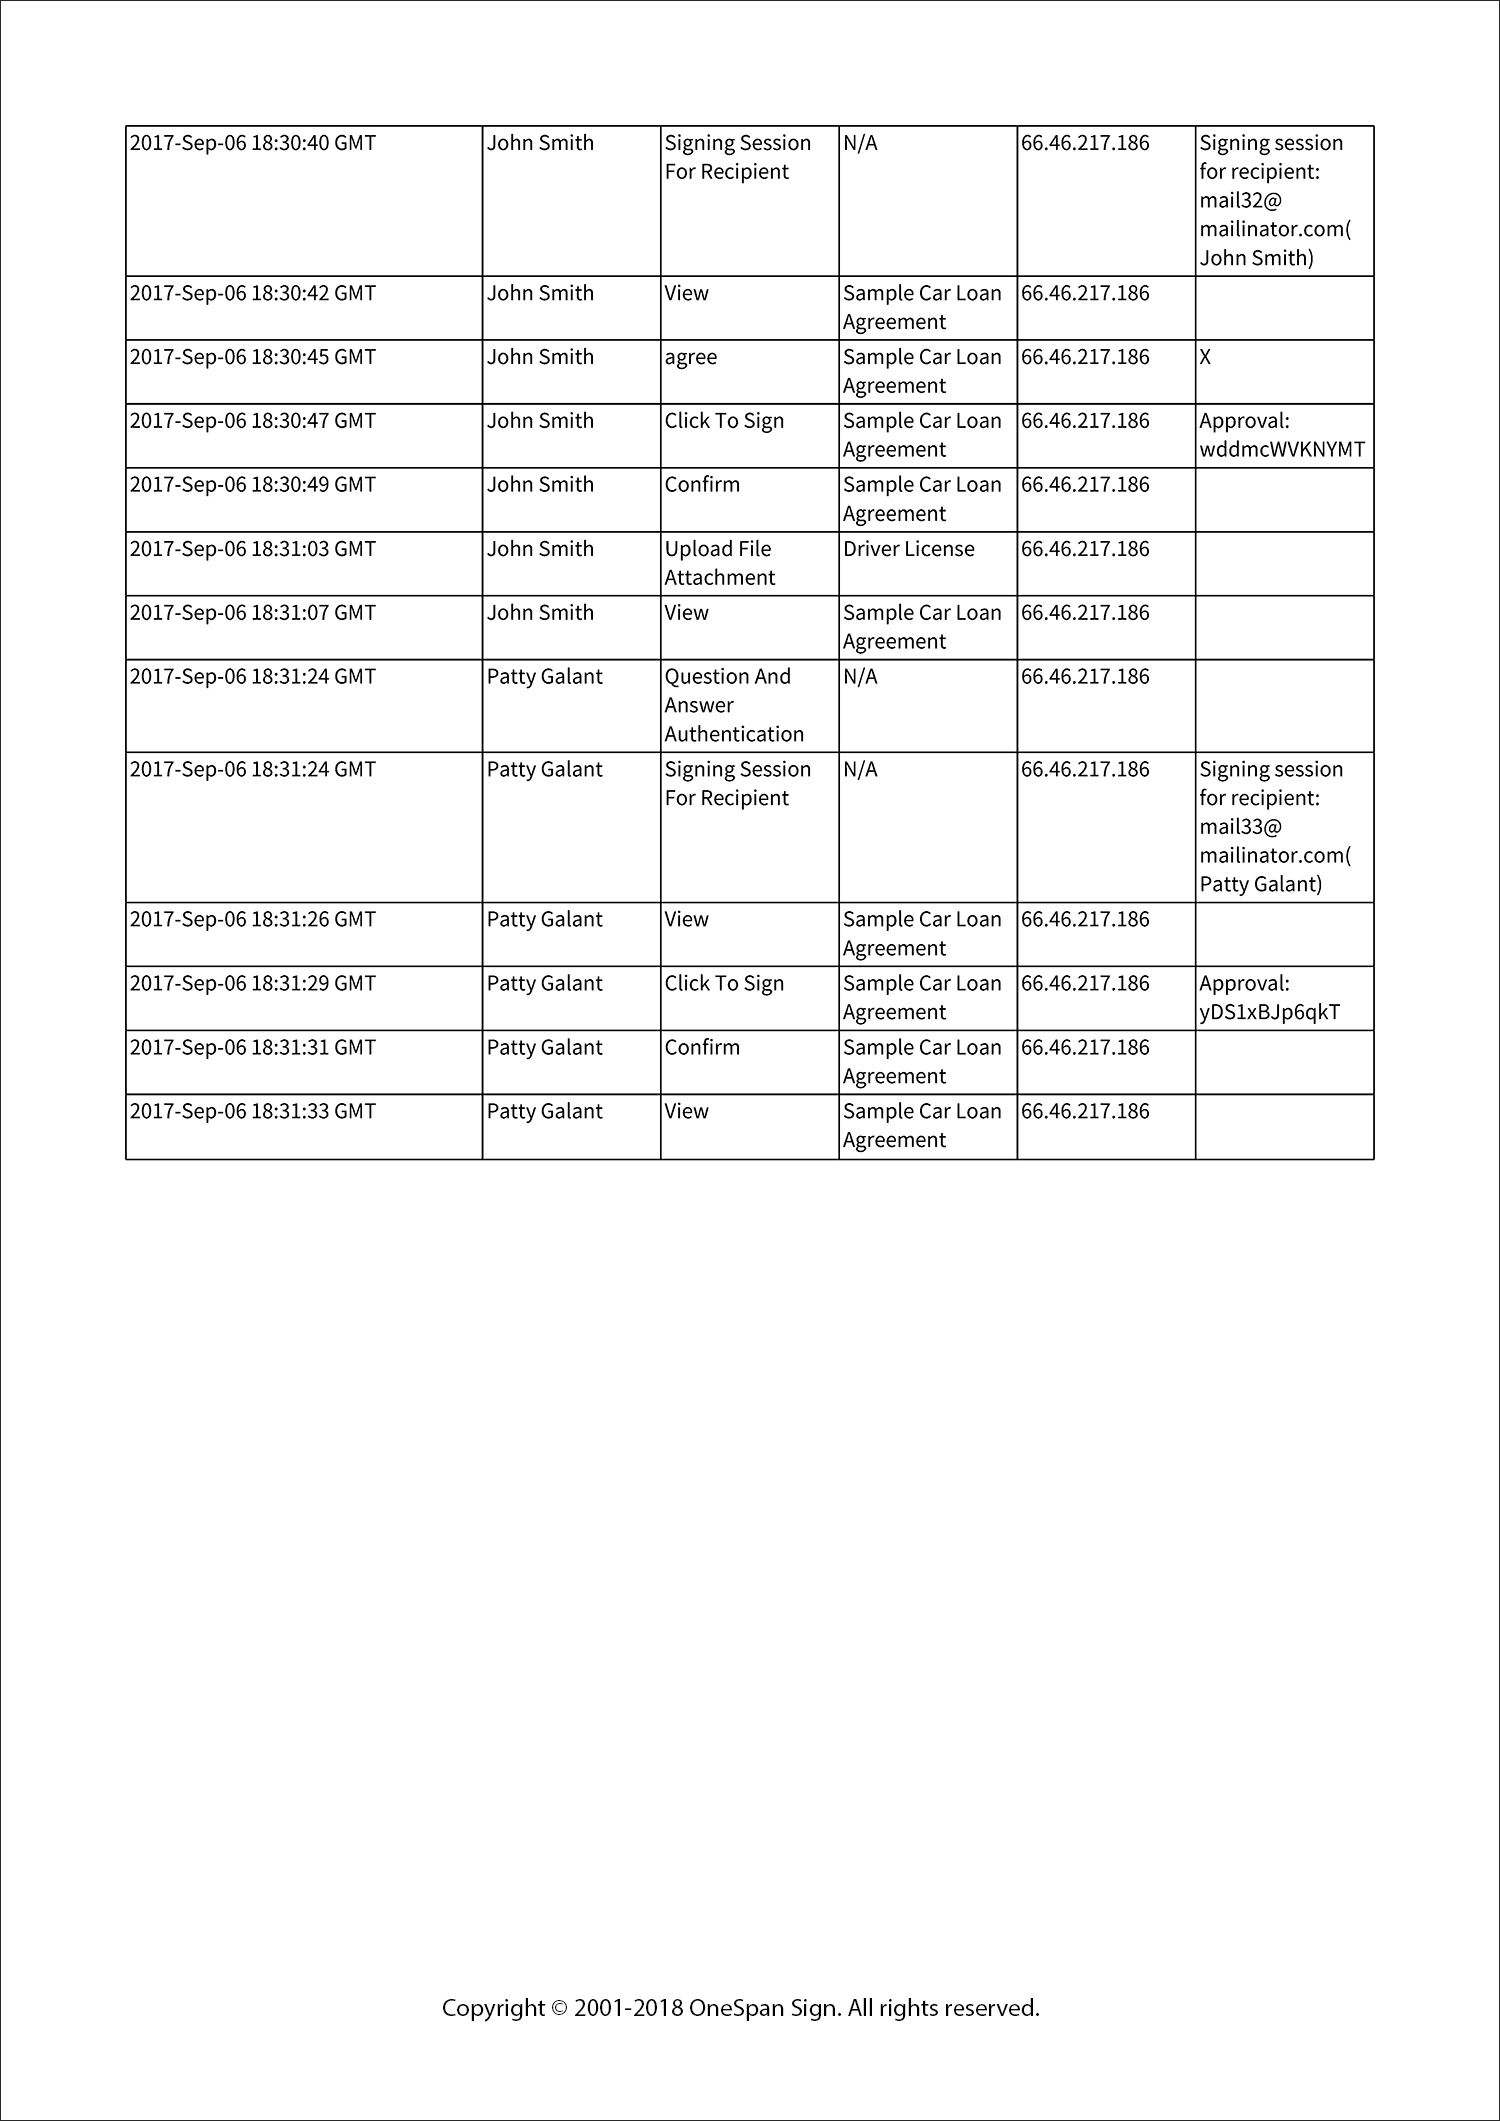
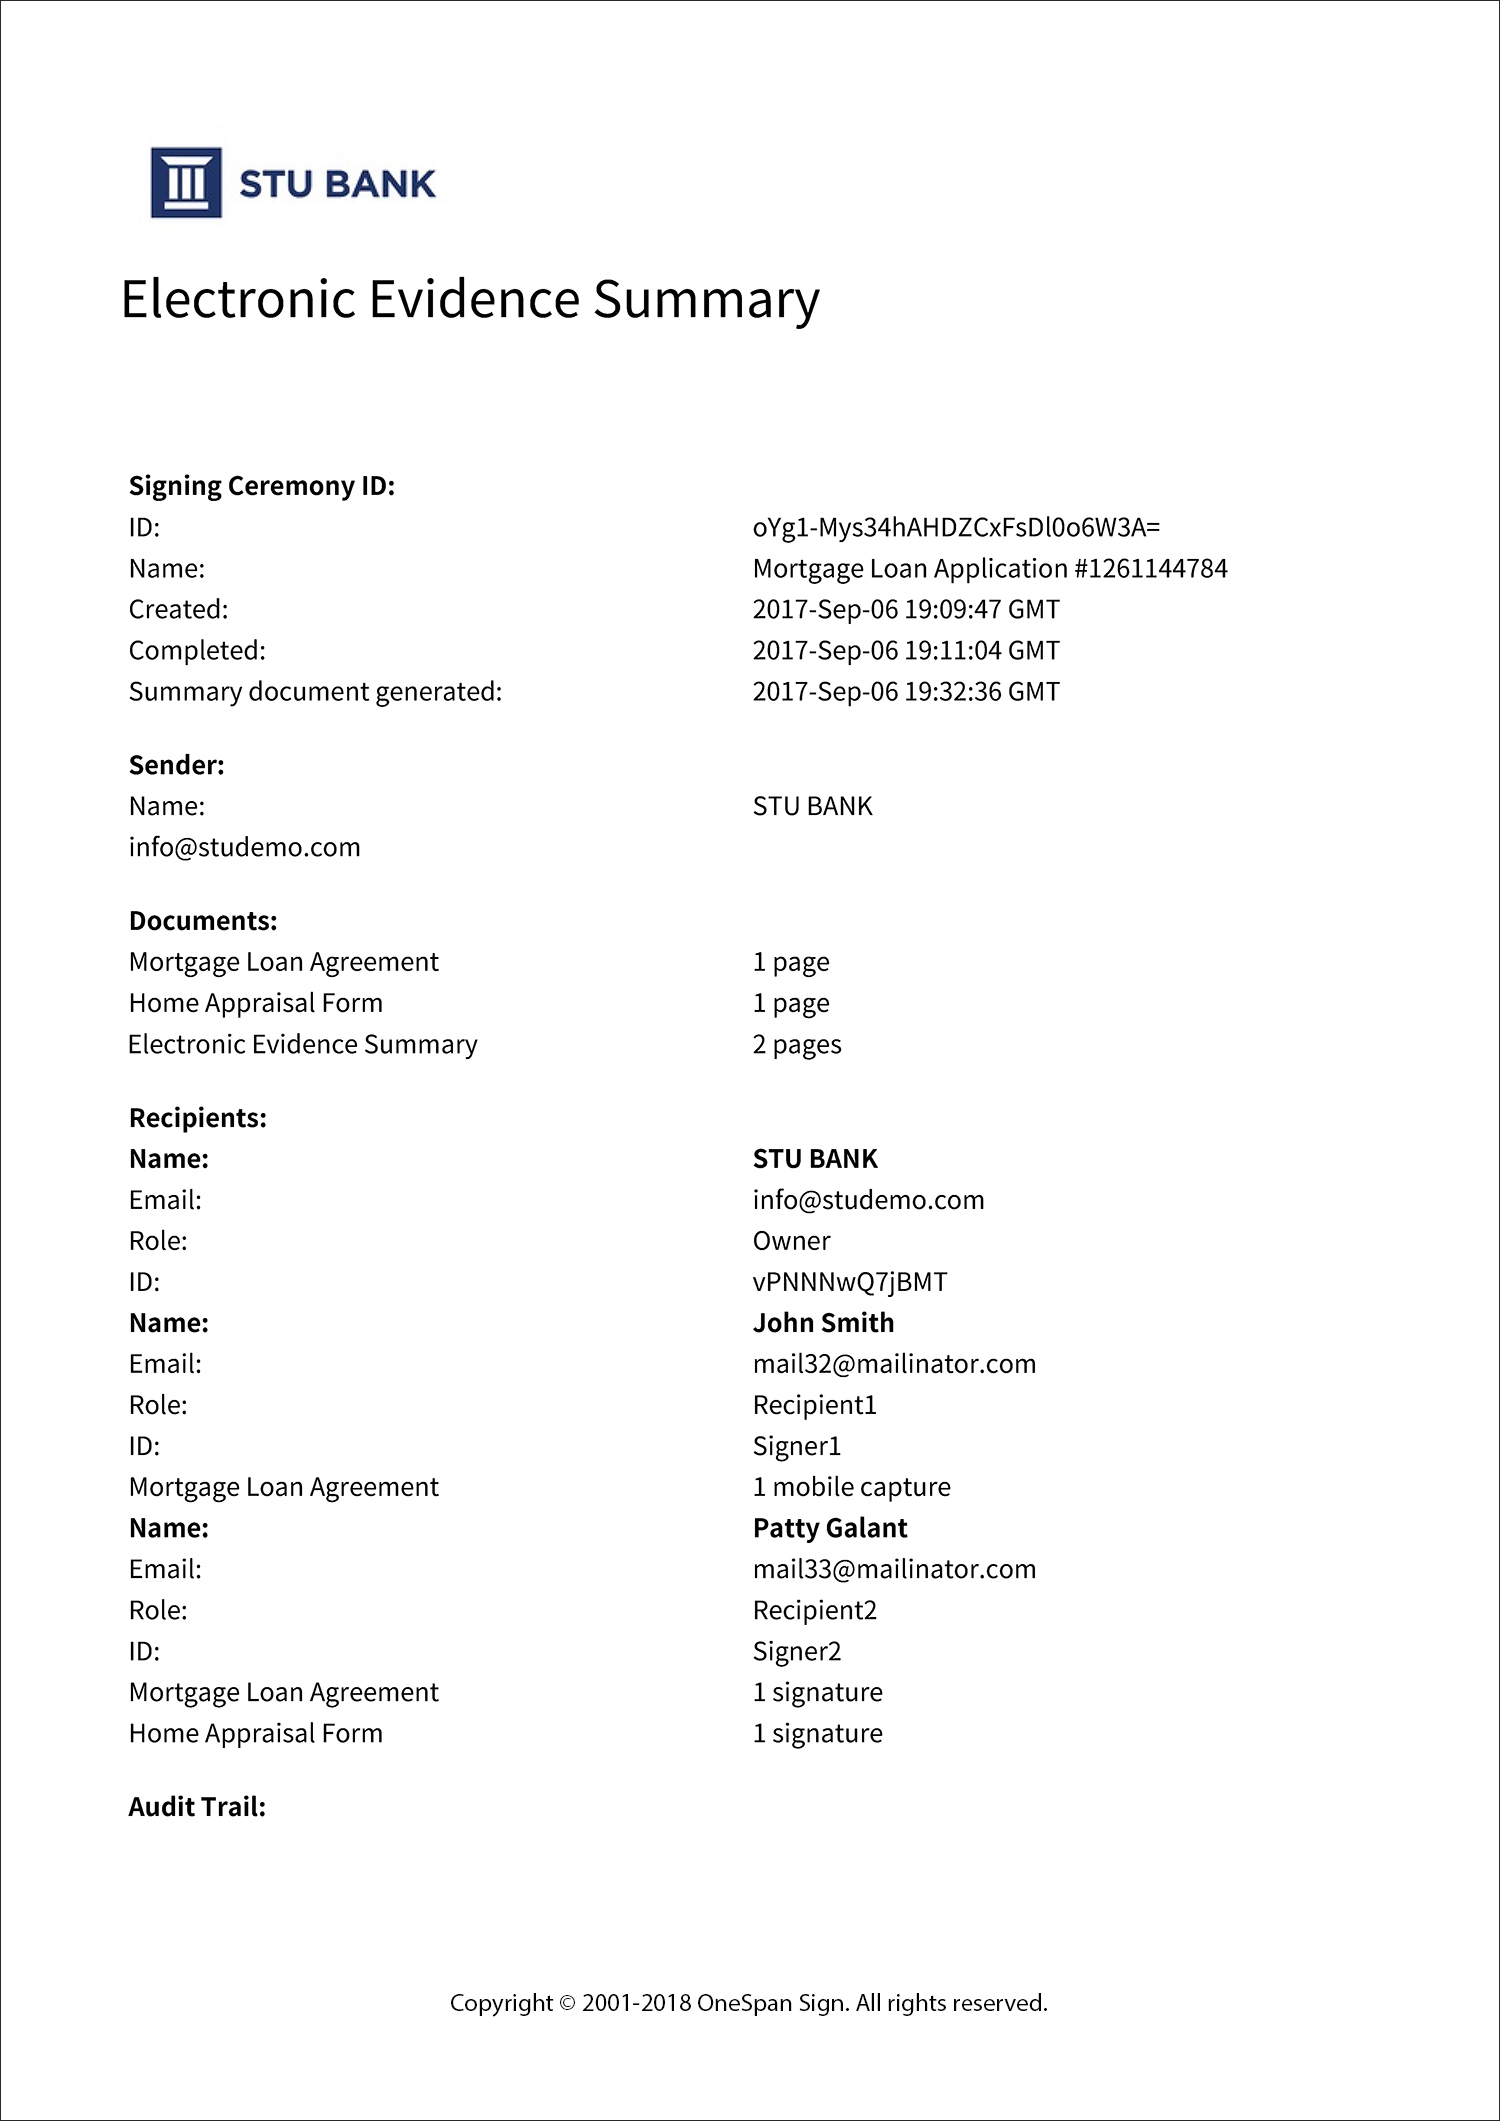
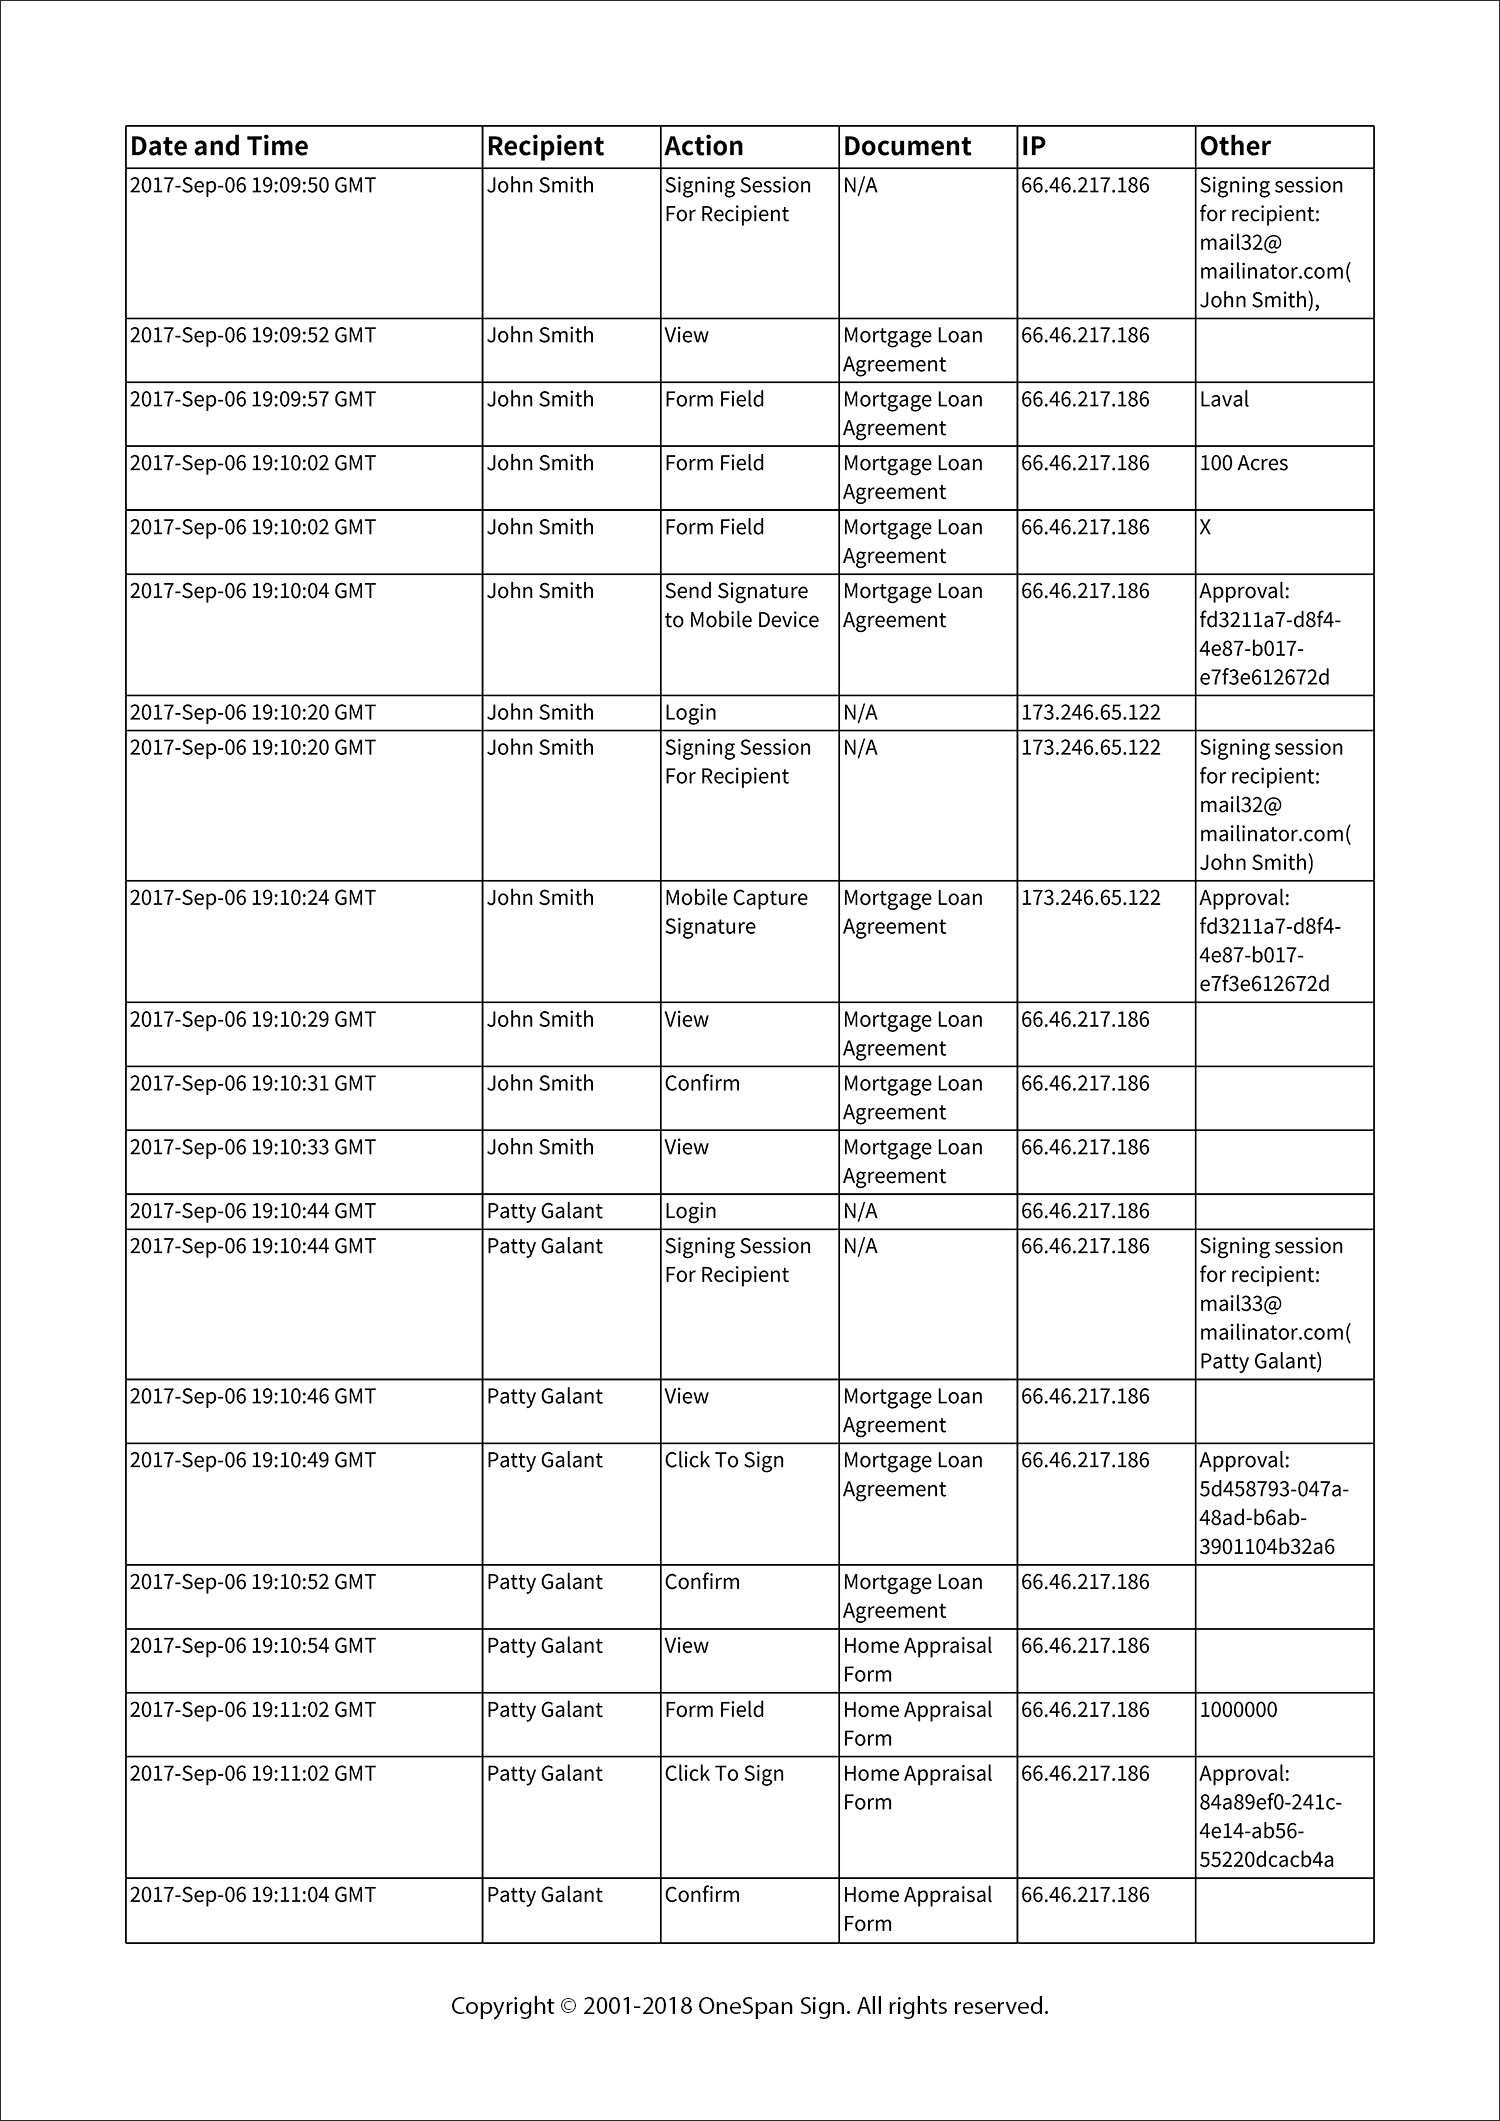
For every completed transaction, OneSpan Sign captures an extensive Evidence Summary and Audit Trail. In addition, the Audit Trail is embedded directly within an e-signed document. In other words, it is information stored in a signed document about the signatures that have been applied to it. Among other elements, this information includes the signer's name or organization, the signature's date and time, the digital certificate to be used for document validation, and the certificate chain to be used for certificate validation.
The first step is to build the OneSpan Sign client using the API key and environment URL.
EslClient eslClient = new EslClient( API_KEY, API_URL );
The following step is to build the package, which will contain a single signer and one document with a signature. The signer's information is also injected onto the document during package creation using OneSpan Sign's Field Injection feature and the signature is placed using the Position Extraction feature.
DocumentPackage documentPackage = PackageBuilder.newPackageNamed("Personal Loan Application") .withSigner(SignerBuilder.newSignerWithEmail("[email protected]") .withFirstName("John") .withLastName("Smith") .withCustomId("Signer1")) .withDocument(DocumentBuilder.newDocumentWithName("Personal Loan Agreement") .fromFile("../personal-loan.pdf") .enableExtraction() .withSignature(SignatureBuilder.signatureFor("[email protected]") .withName("borrower_signature") .withPositionExtracted() .withField(FieldBuilder.signatureDate() .withName("date") .withPositionExtracted())) .withInjectedField(FieldBuilder.textField() .withName("dollars") .withValue("50000")) .withInjectedField(FieldBuilder.textField() .withName("full_name") .withValue("John Smith")) .withInjectedField(FieldBuilder.textField() .withName("address") .withValue("123 Main St.")) ) .build();
Finally, we send the transaction using the OneSpan Sign client:
PackageId packageId = eslClient.createAndSendPackage( documentPackage );
With OneSpan Sign, you can fully customize all emails sent by the system to end-users and administrators. Each email template can be customized for each language supported by OneSpan Sign. Note that customizing your email templates must be done with help from our Technical Support team ([email protected]; 1-855-MYESIGN).
You also have the ability to customize the OneSpan Sign New Signer Experience (select "New Signer Experience" tab). This allows you to seamlessly integrate the signing process within your own web application. OneSpan Sign provides various options for customizing the look and feel of the Signer Experience.
The first step is to build the OneSpan Sign client using the API key and environment URL.
EslClient eslClient = new EslClient( API_KEY, API_URL );
The following step is to build the package, which will contain a single signer and one document with a signature. The signer's information is also injected onto the document during package creation using OneSpan Sign's Field Injection feature and the signature is placed using the Position Extraction feature.
DocumentPackage documentPackage = PackageBuilder.NewPackageNamed("Personal Loan Application") .WithSigner(SignerBuilder.NewSignerWithEmail("[email protected]") .WithFirstName("John") .WithLastName("Smith") .WithCustomId("Signer1")) .WithDocument(DocumentBuilder.NewDocumentNamed("Personal Loan Agreement") .FromFile("../personal-loan.pdf") .EnableExtraction() .WithSignature(SignatureBuilder.SignatureFor("[email protected]") .WithName("borrower_signature") .WithPositionExtracted() .WithField(FieldBuilder.SignatureDate() .WithName("date") .WithPositionExtracted())) .WithInjectedField(FieldBuilder.TextField() .WithName("dollars") .WithValue("50000")) .WithInjectedField(FieldBuilder.TextField() .WithName("full_name") .WithValue("John Smith")) .WithInjectedField(FieldBuilder.TextField() .WithName("address") .WithValue("123 Main St.")) ) .Build();
Finally, we send the transaction using the OneSpan Sign client:
PackageId packageId = eslClient.CreateAndSendPackage( documentPackage );
With OneSpan Sign, you can fully customize all emails sent by the system to end-users and administrators. Each email template can be customized for each language supported by OneSpan Sign. Note that customizing your email templates must be done with help from our Technical Support team ([email protected]; 1-855-MYESIGN).
You also have the ability to customize the OneSpan Sign New Signer Experience (select "New Signer Experience" tab). This allows you to seamlessly integrate the signing process within your own web application. OneSpan Sign provides various options for customizing the look and feel of the Signer Experience.
When the form is submitted, we make an http POST call to send the signature request with the corresponding form information. The package we build contains a single signer and one document with a signature. The signer's information is also injected onto the document during package creation using OneSpan Sign's Field Injection feature and the signature is placed using the Position Extraction feature.
To create and send a package, make an http POST request to:
POST https://sandbox.esignlive.com/api/packages
Click to close/view example http request
POST /api/packages/ HTTP/1.1 Host: sandbox.esignlive.com Connection: keep-alive Content-Length: 80357 Accept: application/json; esl-api-version=11.0 Authorization: Basic {API_KEY} Content-Type: multipart/form-data; boundary=----WebKitFormBoundarycywBKPMXcPHApu4C ------WebKitFormBoundarycywBKPMXcPHApu4C Content-Disposition: form-data; name="file"; filename="3B-PersonalLoan.pdf" Content-Type: application/pdf %PDF-1.5 %µµµµ 1 0 obj <>>> endobj.... ------WebKitFormBoundary7MA4YWxkTrZu0gW Content-Disposition: form-data; name="payload" { "type": "PACKAGE", "status": "SENT", "roles": [ { "id": "Signer1", "type": "SIGNER", "signers": [ { "email": "[email protected]", "firstName": "John", "lastName": "Smith", "id": "Signer1" } ] } ], "name": "Personal Loan Application", "documents": [ { "fields": [ { "value": "10000", "name": "dollars" }, { "value": "John Smith", "name": "full_name" }, { "value": "123 Main St", "name": "address" }, { "value": "New York", "name": "city" }, { "value": "NY", "name": "state" } ], "extract": true, "name": "Sample Loan Agreement", "id": "loan", "approvals": [ { "role": "Signer1", "fields": [ { "type": "SIGNATURE", "extract": "true", "subtype": "CAPTURE", "name": "borrower_signature" }, { "type": "INPUT", "extract": "true", "binding": "{approval.signed}", "subtype": "LABEL", "name": "date" }, { "type": "INPUT", "extract": "true", "binding": "{approval.signed}", "subtype": "LABEL", "name": "date2" } ] } ] } ] } ------WebKitFormBoundary7MA4YWxkTrZu0gW--
With OneSpan Sign, you can fully customize all emails sent by the system to end-users and administrators. Each email template can be customized for each language supported by OneSpan Sign. Note that customizing your email templates must be done with help from our Technical Support team ([email protected]; 1-855-MYESIGN).
You also have the ability to customize the OneSpan Sign New Signer Experience (select "New Signer Experience" tab). This allows you to seamlessly integrate the signing process within your own web application. OneSpan Sign provides various options for customizing the look and feel of the Signer Experience.
Don't worry, this is purely for demonstration purposes. Fill out the Car Loan form and discover how easy it is to integrate OneSpan Sign into your solution.
At a high level, the e-signature process is quite simple. The document to be signed originates in your application. It is then passed to OneSpan Sign and put into a transaction, where signers, signature locations, and other properties are defined. Once completed, the transaction is sent to your recipients. After signing is completed, the e-signed documents and audit trail can be downloaded and managed within your application.
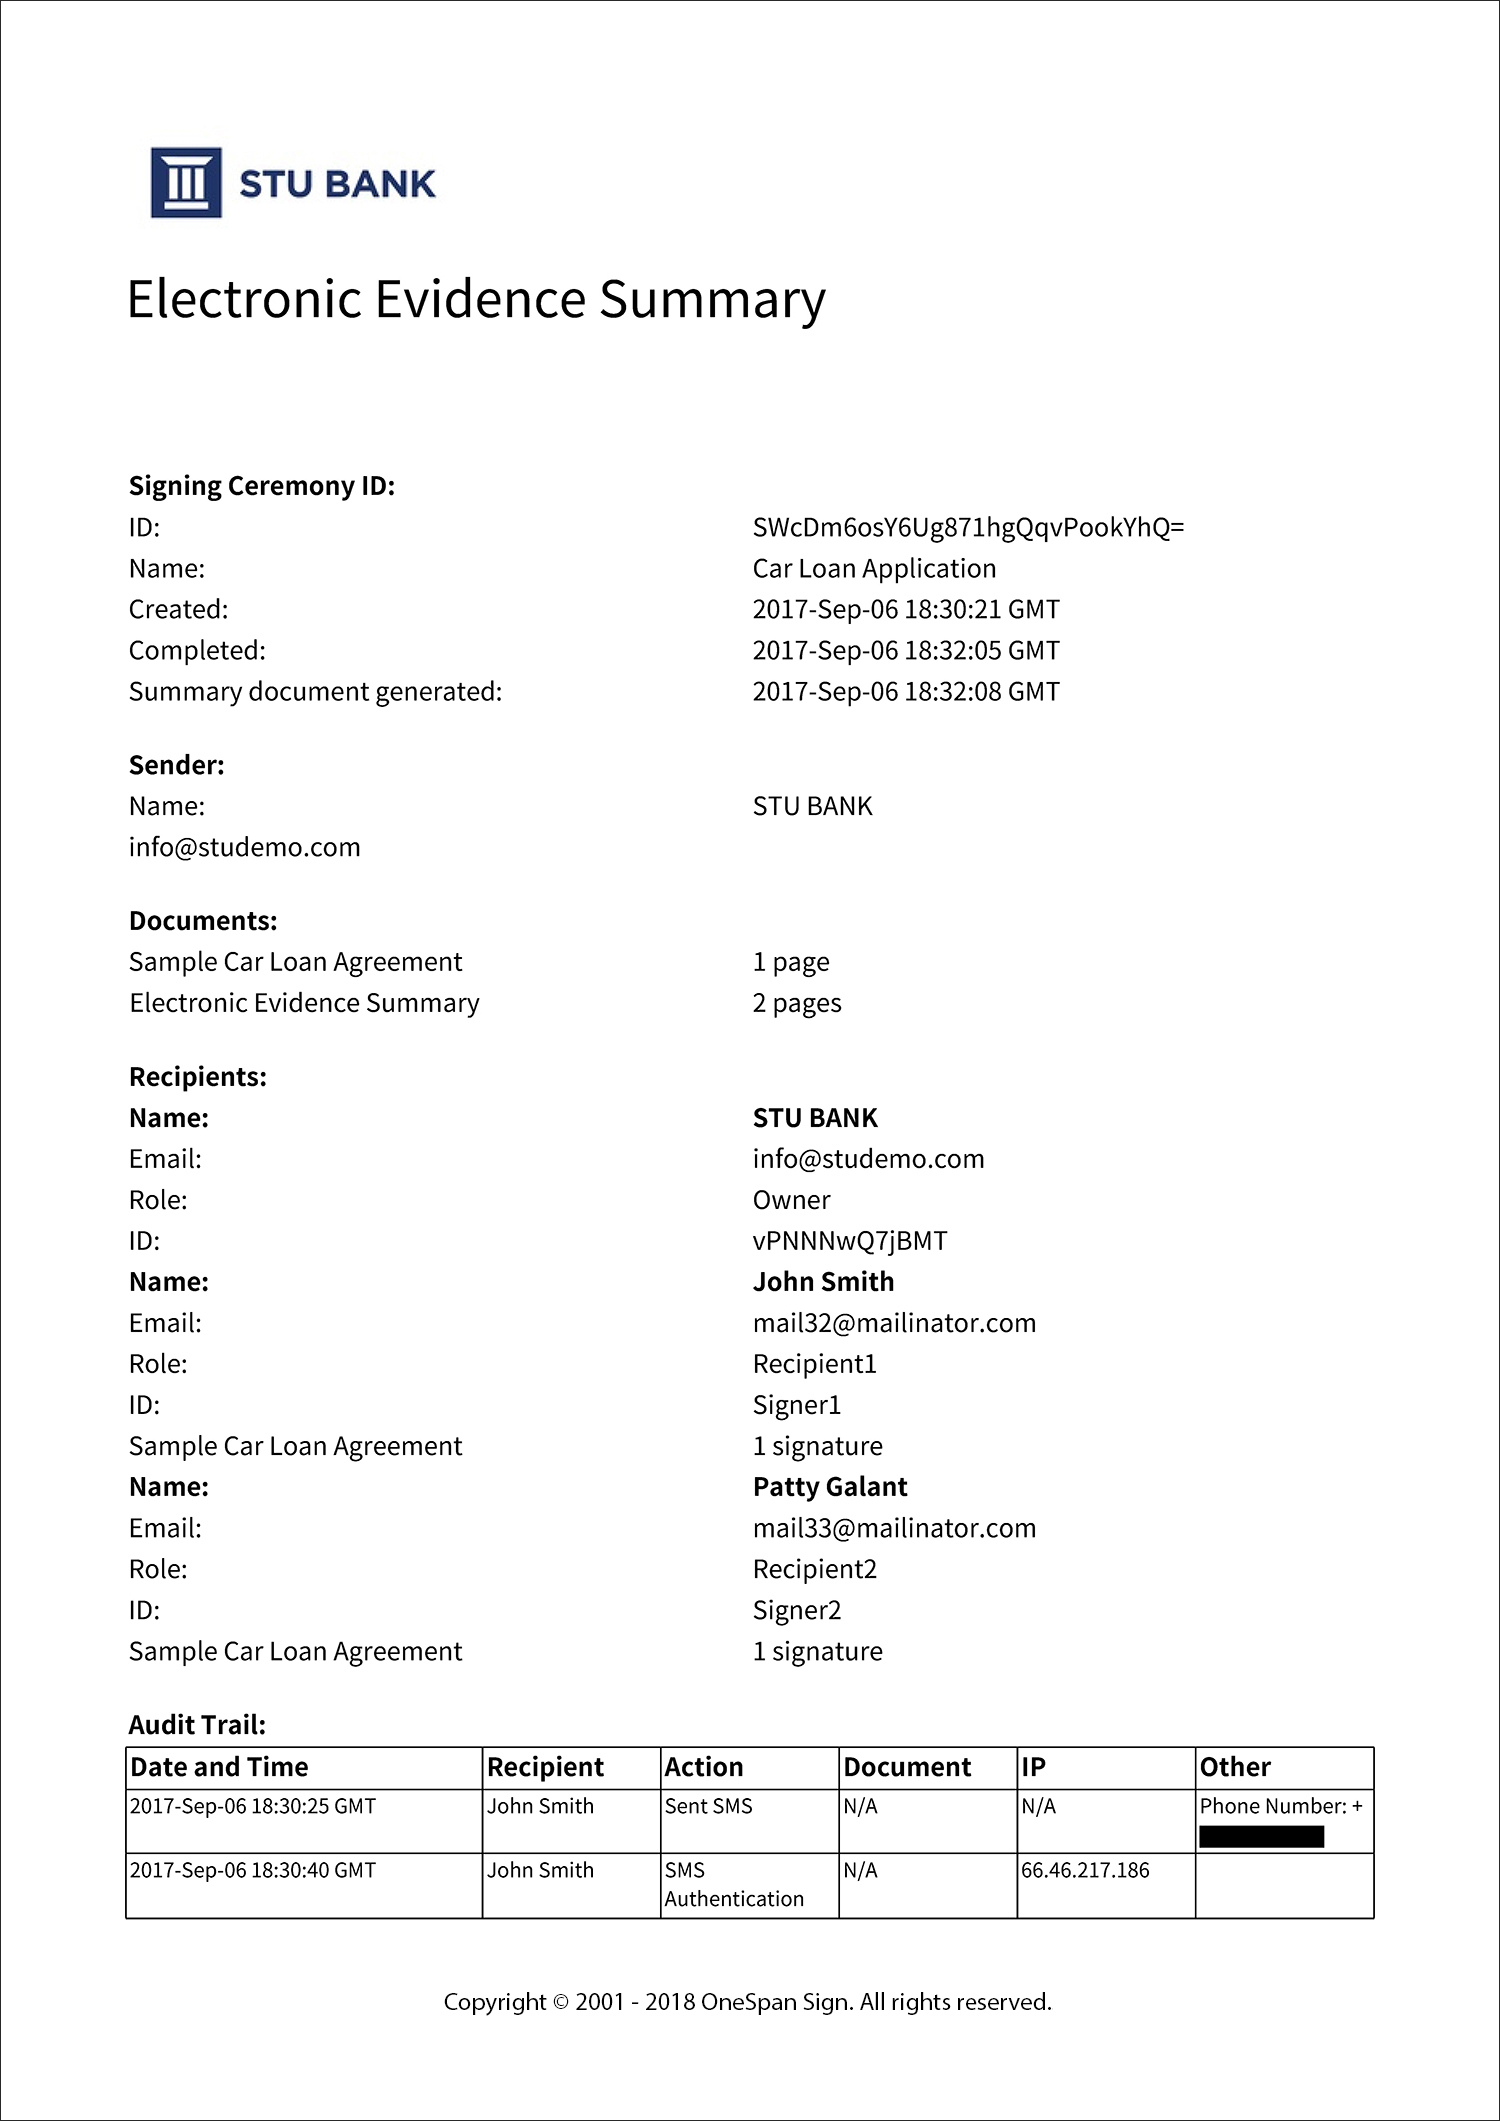
For every completed transaction, OneSpan Sign captures an extensive Evidence Summary and Audit Trail. In addition, the Audit Trail is embedded directly within an e-signed document. In other words, it is information stored in a signed document about the signatures that have been applied to it. Among other elements, this information includes the signer's name or organization, the signature's date and time, the digital certificate to be used for document validation, and the certificate chain to be used for certificate validation.
The first step is to build the OneSpan Sign client using the API key and environment URL.
EslClient eslClient = new EslClient( API_KEY, API_URL );
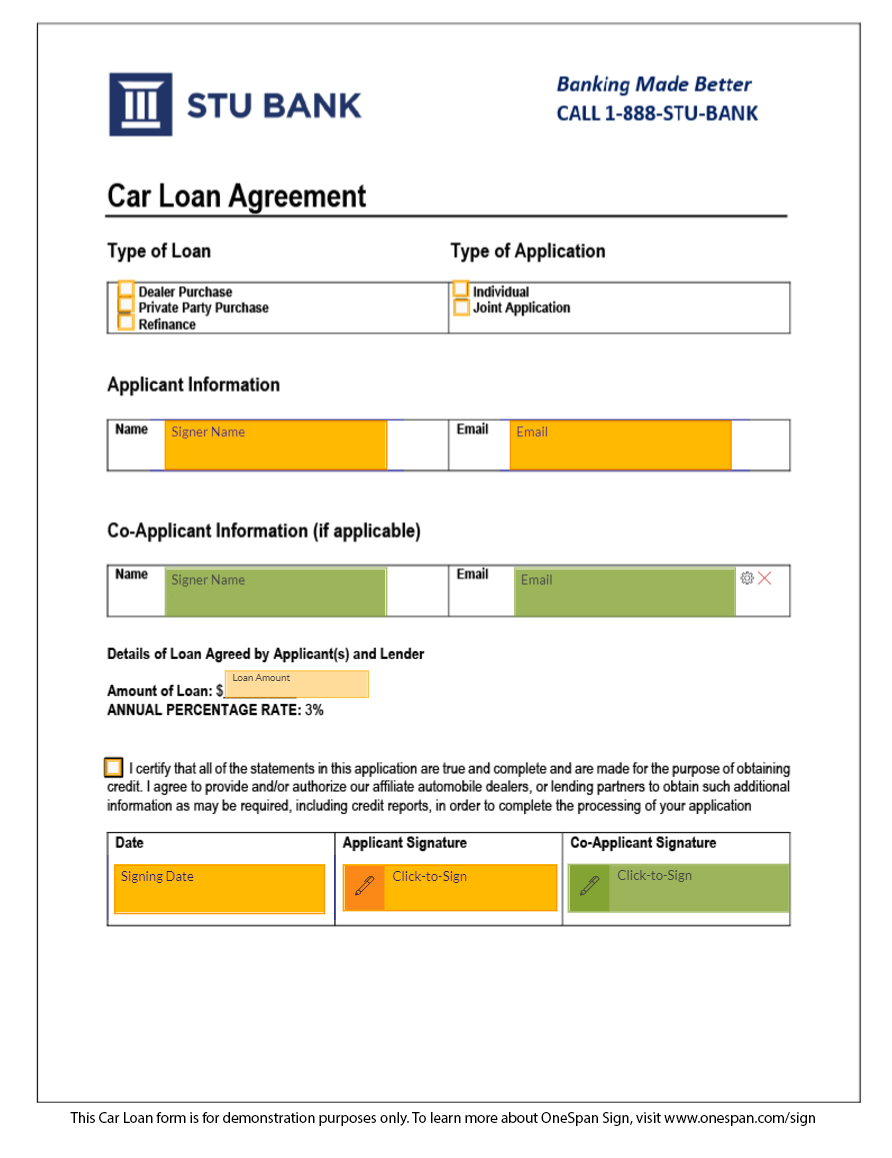
The following step is to build the package, which will contain two signers and one document with a signature for each. The signers' information is also injected onto the document during package creation using OneSpan Sign's Field Injection feature. The signatures and fields are placed using the Position Extraction feature. Additionally, the applicant is required to upload a copy of his/her driver license, which is defined at the signer level. Finally, the applicant will be required to authenticate himself by entering the PIN code sent to his mobile phone, while the co-applicant will need to answer a simple security question.
DocumentPackage documentPackage = PackageBuilder.newPackageNamed("Car Loan Application") .withSigner(SignerBuilder.newSignerWithEmail("[email protected]") .withFirstName("John") .withLastName("Smith") .withCustomId("Signer1") .withSmsSentTo("418-555-5585") .withAttachmentRequirement(AttachmentRequirementBuilder.newAttachmentRequirementWithName("Driver license") .withDescription("Please upload a copy of your driver license.") .isRequiredAttachment() .build())) .withSigner(SignerBuilder.newSignerWithEmail("[email protected]") .withFirstName("Patty") .withLastName("Galant") .withCustomId("Signer2") .challengedWithQuestions(ChallengeBuilder.firstQuestion("What's 1+1?") .answer("2"))) .withDocument(DocumentBuilder.newDocumentWithName("Personal Loan Agreement") .fromFile("../4B-CarLoan.pdf") .enableExtraction() .withSignature(SignatureBuilder.signatureFor("[email protected]") .withName("applicant_signature") .withPositionExtracted() .withField(FieldBuilder.signatureDate() .withName("Date") .withPositionExtracted()) .withField(FieldBuilder.checkBox() .withName("agree") .withPositionExtracted()) .withField(FieldBuilder.radioButton("radioGroup") .withName("radio1") .withPositionExtracted() .withValue("X")) .withField(FieldBuilder.radioButton("radioGroup") .withName("radio2") .withPositionExtracted()) .withField(FieldBuilder.radioButton("radioGroup") .withName("radio3") .withPositionExtracted())) .withSignature(SignatureBuilder.signatureFor("[email protected]") .withName("coapplicant_signature") .withPositionExtracted()) .withInjectedField(FieldBuilder.textField() .withName("amount") .withValue("50000")) .withInjectedField(FieldBuilder.textField() .withName("applicant_name") .withValue("John Smith")) .withInjectedField(FieldBuilder.textField() .withName("applicant_email") .withValue("[email protected]")) .withInjectedField(FieldBuilder.textField() .withName("coapplicant_email") .withValue("[email protected]")) .withInjectedField(FieldBuilder.textField() .withName("coapplicant_name") .withValue("Patty Galant")) .withInjectedField(FieldBuilder.textField() .withName("radio5") .withValue("X")) ) .build();
Finally, we send the transaction using the OneSpan Sign client:
PackageId packageId = eslClient.createAndSendPackage( documentPackage );
When embedding the signer experience into an iframe, the Event Notifier can send notifications to the parent host application. This is particularly useful if you want to take actions when certain steps of the signing ceremony have been accomplished. After receiving such a notification, you can interrupt OneSpan Sign’s normal flow to perform some asynchronous task (e.g. ask the user to confirm a request), and then notify OneSpan Sign to resume its normal flow. In this demo, the Event Notifier is used to switch between signers.
With OneSpan Sign, you can fully customize all emails sent by the system to end-users and administrators. Each email template can be customized for each language supported by OneSpan Sign. Note that customizing your email templates must be done with help from our Technical Support team ([email protected]; 1-855-MYESIGN).
You also have the ability to customize the OneSpan Sign Signer Experience. This allows you to seamlessly integrate the signing process within your own web application. OneSpan Sign provides various options for customizing the look and feel of the Signer Experience.
The first step is to build the OneSpan Sign client using the API key and environment URL.
EslClient eslClient = new EslClient( API_KEY, API_URL );
The following step is to build the package, which will contain two signers and one document with a signature for each. The signers' information is also injected onto the document during package creation using OneSpan Sign's Field Injection feature. The signatures and fields are placed using the Position Extraction feature. Additionally, the applicant is required to upload a copy of his/her driver license, which is defined at the signer level. Finally, the applicant will be required to authenticate himself by entering the PIN code sent to his mobile phone, while the co-applicant will need to answer a simple security question.
DocumentPackage documentPackage = PackageBuilder.NewPackageNamed("Car Loan Application") .WithSigner(SignerBuilder.NewSignerWithEmail("[email protected]") .WithFirstName("John") .WithLastName("Smith") .WithCustomId("Signer1") .WithSMSSentTo("418-555-5585") .WithAttachmentRequirement(AttachmentRequirementBuilder.NewAttachmentRequirementWithName("Driver license") .WithDescription("Please upload a copy of your driver license.") .IsRequiredAttachment() .Build())) .WithSigner(SignerBuilder.NewSignerWithEmail("[email protected]") .WithFirstName("Patty") .WithLastName("Galant") .WithCustomId("Signer2") .ChallengedWithQuestions(ChallengeBuilder.FirstQuestion("What's 1+1?") .Answer("2"))) .WithDocument(DocumentBuilder.NewDocumentNamed("Car Loan Agreement") .FromFile("../4B-CarLoan.pdf") .EnableExtraction() .WithSignature(SignatureBuilder.SignatureFor("[email protected]") .WithName("applicant_signature") .WithPositionExtracted() .WithField(FieldBuilder.SignatureDate() .WithName("Date") .WithPositionExtracted()) .WithField(FieldBuilder.CheckBox() .WithName("agree") .WithPositionExtracted()) .WithField(FieldBuilder.RadioButton("radioGroup") .WithName("radio1") .WithPositionExtracted() .WithValue("X")) .WithField(FieldBuilder.RadioButton("radioGroup") .WithName("radio2") .WithPositionExtracted()) .WithField(FieldBuilder.RadioButton("radioGroup") .WithName("radio3") .WithPositionExtracted())) .WithSignature(SignatureBuilder.SignatureFor("[email protected]") .WithName("coapplicant_signature") .WithPositionExtracted()) .WithInjectedField(FieldBuilder.TextField() .WithName("amount") .WithValue("50000")) .WithInjectedField(FieldBuilder.TextField() .WithName("applicant_name") .WithValue("John Smith")) .WithInjectedField(FieldBuilder.TextField() .WithName("applicant_email") .WithValue("[email protected]")) .WithInjectedField(FieldBuilder.TextField() .WithName("coapplicant_email") .WithValue("[email protected]")) .WithInjectedField(FieldBuilder.TextField() .WithName("coapplicant_name") .WithValue("Patty Galant")) .WithInjectedField(FieldBuilder.TextField() .WithName("radio5") .WithValue("X")) ) .Build();
Finally, we send the transaction using the OneSpan Sign client:
PackageId packageId = eslClient.CreateAndSendPackage( documentPackage );
When embedding the signer experience into an iframe, the Event Notifier can send notifications to the parent host application. This is particularly useful if you want to take actions when certain steps of the signing ceremony have been accomplished. After receiving such a notification, you can interrupt OneSpan Sign’s normal flow to perform some asynchronous task (e.g. ask the user to confirm a request), and then notify OneSpan Sign to resume its normal flow. In this demo, the Event Notifier is used to switch between signers.
With OneSpan Sign, you can fully customize all emails sent by the system to end-users and administrators. Each email template can be customized for each language supported by OneSpan Sign. Note that customizing your email templates must be done with help from our Technical Support team ([email protected]; 1-855-MYESIGN).
You also have the ability to customize the OneSpan Sign Signer Experience. This allows you to seamlessly integrate the signing process within your own web application. OneSpan Sign provides various options for customizing the look and feel of the Signer Experience.
When the form is submitted, we make an http POST call to send the signature request with the corresponding form information. The package we build contains two signers and one document with a signature for each. The signers' information is also injected onto the document during package creation using OneSpan Sign's Field Injection feature. The signatures and fields are placed using the Position Extraction feature. Additionally, the applicant is required to upload a copy of his/her driver license, which is defined at the signer level. Finally, the applicant will be required to authenticate himself by entering the PIN code sent to his mobile phone, while the co-applicant will need to answer a simple security question.
To create and send a package, make an http POST request to:
POST https://sandbox.esignlive.com/api/packages
Click to close/view example http request
POST /api/packages/ HTTP/1.1 Host: sandbox.esignlive.com Connection: keep-alive Content-Length: 80357 Accept: application/json; esl-api-version=11.0 Authorization: Basic {API_KEY} Content-Type: multipart/form-data; boundary=----WebKitFormBoundarycywBKPMXcPHApu4C ------WebKitFormBoundarycywBKPMXcPHApu4C Content-Disposition: form-data; name="file"; filename="4B-CarLoan.pdf" Content-Type: application/pdf %PDF-1.5 %µµµµ 1 0 obj <>>> endobj.... ------WebKitFormBoundary7MA4YWxkTrZu0gW Content-Disposition: form-data; name="payload" { "type": "PACKAGE", "status": "SENT", "roles": [ { "id": "Signer1", "type": "SIGNER", "attachmentRequirements": [ { "name": "Driver License", "description": "Please upload a copy of your driver license.", "required": "true", "status": "INCOMPLETE" } ], "signers": [ { "email": "[email protected]", "firstName": "John", "lastName": "Smith", "id": "Signer1", "auth": { "scheme": "SMS", "challenges": [ { "question": "418-555-5585" } ] } } ] }, { "id": "Signer2", "type": "SIGNER", "signers": [ { "email": "[email protected]", "firstName": "Patty", "lastName": "Galant", "id": "Signer2", "auth": { "scheme": "CHALLENGE", "challenges": [ { "question": "What's 1+1?", "answer": "2", "maskInput": false } ] } } ] } ], "name": "Car Loan Application", "documents": [ { "fields": [ { "value": "50000", "name": "amount" }, { "value": "[email protected]", "name": "applicant_email" }, { "value": "John Smith", "name": "applicant_name" }, { "value": "[email protected]", "name": "coapplicant_email" }, { "value": "Patty Galant", "name": "coapplicant_name" }, { "value": "X", "name": "radio5" } ], "extract": true, "name": "Sample Loan Agreement", "id": "loan", "approvals": [ { "role": "Signer1", "fields": [ { "type": "SIGNATURE", "extract": "true", "subtype": "FULLNAME", "name": "applicant_signature" }, { "type": "INPUT", "extract": "true", "binding": "{approval.signed}", "subtype": "LABEL", "name": "Date" }, { "type": "INPUT", "extract": "true", "subtype": "CHECKBOX", "name": "agree", "validation": { "required": "true" } }, { "type": "INPUT", "extract": "true", "value": "X", "subtype": "RADIO", "name": "radio1", "validation": { "enum": [ "radioGroup" ] } }, { "type": "INPUT", "extract": "true", "subtype": "RADIO", "name": "radio2", "validation": { "enum": [ "radioGroup" ] } }, { "type": "INPUT", "extract": "true", "subtype": "RADIO", "name": "radio3", "validation": { "enum": [ "radioGroup" ] } } ] }, { "role": "Signer2", "fields": [ { "type": "SIGNATURE", "extract": "true", "subtype": "FULLNAME", "name": "coapplicant_signature" } ] } ] } ] } ------WebKitFormBoundary7MA4YWxkTrZu0gW--
When embedding the signer experience into an iframe, the Event Notifier can send notifications to the parent host application. This is particularly useful if you want to take actions when certain steps of the signing ceremony have been accomplished. After receiving such a notification, you can interrupt OneSpan Sign’s normal flow to perform some asynchronous task (e.g. ask the user to confirm a request), and then notify OneSpan Sign to resume its normal flow. In this demo, the Event Notifier is used to switch between signers.
With OneSpan Sign, you can fully customize all emails sent by the system to end-users and administrators. Each email template can be customized for each language supported by OneSpan Sign. Note that customizing your email templates must be done with help from our Technical Support team ([email protected]; 1-855-MYESIGN).
You also have the ability to customize the OneSpan Sign Signer Experience. This allows you to seamlessly integrate the signing process within your own web application. OneSpan Sign provides various options for customizing the look and feel of the Signer Experience.
Don't worry, this is purely for demonstration purposes. Fill out the Mortgage Loan form and discover how easy it is to integrate OneSpan Sign into your solution.
At a high level, the e-signature process is quite simple. The document to be signed originates in your application. It is then passed to OneSpan Sign and put into a transaction, where signers, signature locations, and other properties are defined. Once completed, the transaction is sent to your recipients. After signing is completed, the e-signed documents and audit trail can be downloaded and managed within your application.
For every completed transaction, OneSpan Sign captures an extensive Evidence Summary and Audit Trail. In addition, the Audit Trail is embedded directly within an e-signed document. In other words, it is information stored in a signed document about the signatures that have been applied to it. Among other elements, this information includes the signer's name or organization, the signature's date and time, the digital certificate to be used for document validation, and the certificate chain to be used for certificate validation.
The first step is to build the OneSpan Sign client using the API key and environment URL.
EslClient eslClient = new EslClient( API_KEY, API_URL );
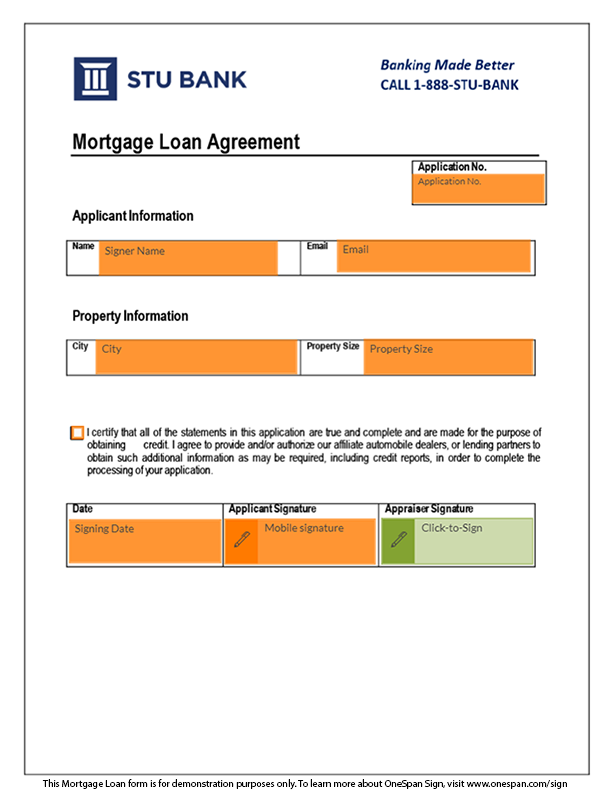
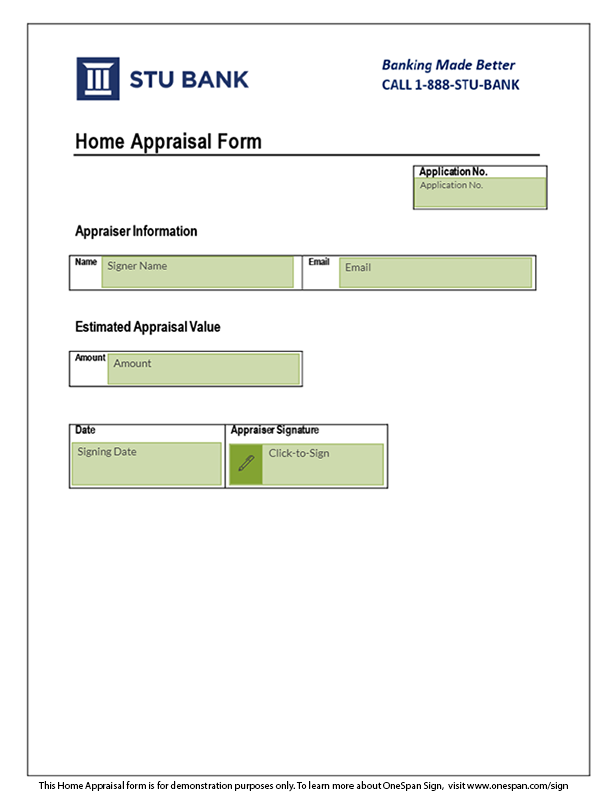
The following step is to build the package, which will contain two signers and two documents with a signature on each. The signers' information is also injected onto the document during package creation using OneSpan Sign's Field Injection feature. The signatures and fields are placed using the Text Tag Extraction feature. For this particular use case, the applicant will sign using his or her mobile device.
DocumentPackage documentPackage = PackageBuilder.newPackageNamed("Mortgage Loan Application") .withSigner(SignerBuilder.newSignerWithEmail("[email protected]") .withFirstName("John") .withLastName("Smith") .withCustomId("Signer1")) .withSigner(SignerBuilder.newSignerWithEmail("[email protected]") .withFirstName("Patty") .withLastName("Galant") .withCustomId("Signer2")) .withDocument(DocumentBuilder.newDocumentWithName("Mortgage Loan Agreement") .WithId("loan") .fromFile("../mortgage-loan.pdf") .enableExtraction() .withExtractionType(ExtractionType.TEXT_TAGS_ONLY) .withInjectedField(FieldBuilder.textField() .withName("applicant_name") .withValue("John Smith")) .withInjectedField(FieldBuilder.textField() .withName("applicant_email") .withValue("[email protected]")) .withInjectedField(FieldBuilder.textField() .withName("application_number") .withValue("1143216218")) ) .withDocument(DocumentBuilder.newDocumentWithName("Appraisal Form") .WithId("loan2") .fromFile("../appraisal-form.pdf") .enableExtraction() .withExtractionType(ExtractionType.TEXT_TAGS_ONLY) .withInjectedField(FieldBuilder.textField() .withName("coapplicant_name") .withValue("Patty Galant")) .withInjectedField(FieldBuilder.textField() .withName("coapplicant_email") .withValue("[email protected]")) .withInjectedField(FieldBuilder.textField() .withName("coapplicant_name") .withValue("Patty Galant")) .withInjectedField(FieldBuilder.textField() .withName("application_number") .withValue("1143216218")) ) .build(); PackageId packageId = eslClient.createPackage(documentPackage);
Once the package has been created, you can now configure the Document Visibility. In this example, the Applicant will only view and sign the Mortgage Loan form in the Signer Experience. The Appraiser will view and sign both Mortgage Loan form and Home Appraisal form.
List<String> signerIdsList1 = new ArrayList<String>(); signerIdsList1.add("Signer1"); signerIdsList1.add("Signer2"); List<String> signerIdsList2 = new ArrayList<String>(); signerIdsList2.add("Signer2"); com.silanis.esl.sdk.DocumentVisibility visibility = DocumentVisibilityBuilder.newDocumentVisibility() .addConfiguration(DocumentVisibilityConfigurationBuilder.newDocumentVisibilityConfiguration(DOC1_ID) .withSignerIds(signerIdsList1)) .addConfiguration(DocumentVisibilityConfigurationBuilder.newDocumentVisibilityConfiguration(DOC2_ID) .withSignerIds(signerIdsList2)) .build(); eslClient.configureDocumentVisibility(packageId, visibility);
Finally, we send the transaction using the OneSpan Sign client:
eslClient.sendPackage( packageId );
With OneSpan Sign, you can fully customize all emails sent by the system to end-users and administrators. Each email template can be customized for each language supported by OneSpan Sign. Note that customizing your email templates must be done with help from our Technical Support team ([email protected]; 1-855-MYESIGN).
You also have the ability to customize the OneSpan Sign Signer Experience. This allows you to seamlessly integrate the signing process within your own web application. OneSpan Sign provides various options for customizing the look and feel of the Signer Experience.
The first step is to build the OneSpan Sign client using the API key and environment URL.
EslClient eslClient = new EslClient( API_KEY, API_URL );
The following step is to build the package, which will contain two signers and two documents with a signature on each. The signers' information is also injected onto the document during package creation using OneSpan Sign's Field Injection feature. The signatures and fields are placed using the Text Tag Extraction feature. For this particular use case, the applicant will sign using his or her mobile device.
DocumentPackage documentPackage = PackageBuilder.NewPackageNamed("Mortgage Loan Application") .WithSigner(SignerBuilder.NewSignerWithEmail("[email protected]") .WithFirstName("John") .WithLastName("Smith") .WithCustomId("Signer1")) .WithSigner(SignerBuilder.NewSignerWithEmail("[email protected]") .WithFirstName("Patty") .WithLastName("Galant") .WithCustomId("Signer2")) .WithDocument(DocumentBuilder.NewDocumentNamed("Mortgage Loan Agreement") .FromFile("../mortgage-loan.pdf") .EnableExtraction() .WithExtractionType(ExtractionType.TEXT_TAGS_ONLY) .WithInjectedField(FieldBuilder.TextField() .WithName("applicant_name") .WithValue("John Smith")) .WithInjectedField(FieldBuilder.TextField() .WithName("applicant_email") .WithValue("[email protected]")) .WithInjectedField(FieldBuilder.TextField() .WithName("application_number") .WithValue("1143216218")) ) .WithDocument(DocumentBuilder.NewDocumentNamed("Appraisal Form") .FromFile("../appraisal-form.pdf") .EnableExtraction() .WithExtractionType(ExtractionType.TEXT_TAGS_ONLY) .WithInjectedField(FieldBuilder.TextField() .WithName("coapplicant_name") .WithValue("Patty Galant")) .WithInjectedField(FieldBuilder.TextField() .WithName("coapplicant_email") .WithValue("[email protected]")) .WithInjectedField(FieldBuilder.TextField() .WithName("coapplicant_name") .WithValue("Patty Galant")) .WithInjectedField(FieldBuilder.TextField() .WithName("application_number") .WithValue("1143216218")) ) .Build(); PackageId packageId = eslClient.CreatePackage(documentPackage);
Once the package has been created, you can now configure the Document Visibility. In this example, the Applicant will only view and sign the Mortgage Loan form in the Signer Experience. The Appraiser will view and sign both Mortgage Loan form and Home Appraisal form.
List<string> signerIdsList1 = new List<string>(); signerIdsList1.Add("Signer1"); signerIdsList1.Add("Signer2"); List<string> signerIdsList2 = new List<string>(); signerIdsList2.Add("Signer2"); Silanis.ESL.SDK.DocumentVisibility visibility = DocumentVisibilityBuilder.NewDocumentVisibility() .AddConfiguration(DocumentVisibilityConfigurationBuilder.NewDocumentVisibilityConfiguration(DOC1_ID) .WithSignerIds(signerIdsList1)) .AddConfiguration(DocumentVisibilityConfigurationBuilder.NewDocumentVisibilityConfiguration(DOC2_ID) .WithSignerIds(signerIdsList2)) .Build(); eslClient.ConfigureDocumentVisibility(packageId, visibility);
Finally, we send the transaction using the OneSpan Sign client:
eslClient.SendPackage( packageId );
With OneSpan Sign, you can fully customize all emails sent by the system to end-users and administrators. Each email template can be customized for each language supported by OneSpan Sign. Note that customizing your email templates must be done with help from our Technical Support team ([email protected]; 1-855-MYESIGN).
You also have the ability to customize the OneSpan Sign Signer Experience. This allows you to seamlessly integrate the signing process within your own web application. OneSpan Sign provides various options for customizing the look and feel of the Signer Experience.
When the form is submitted, we make an http POST call to send the signature request with the corresponding form information. The package we build contains two signers and two documents with a signature on each. The signers' information is also injected onto the document during package creation using OneSpan Sign's Field Injection feature. The signatures and fields are placed using the Text Tag Extraction feature. For this particular use case, the applicant will sign using his or her mobile device.
To create a package, make an http POST request to:
POST https://sandbox.esignlive.com/api/packages
Click to close/view example http request
POST /api/packages/ HTTP/1.1 Host: sandbox.esignlive.com Connection: keep-alive Content-Length: 80357 Accept: application/json; esl-api-version=11.0 Authorization: Basic {API_KEY} Content-Type: multipart/form-data; boundary=----WebKitFormBoundarycywBKPMXcPHApu4C ------WebKitFormBoundarycywBKPMXcPHApu4C Content-Disposition: form-data; name="file"; filename="mortgage-loan.pdf" Content-Type: application/pdf %PDF-1.5 %µµµµ 1 0 obj <>>> endobj.... ------WebKitFormBoundarycywBKPMXcPHApu4C Content-Disposition: form-data; name="file"; filename="appraisal-form.pdf" Content-Type: application/pdf %PDF-1.5 %µµµµ 1 0 obj <>>> endobj.... ------WebKitFormBoundary7MA4YWxkTrZu0gW Content-Disposition: form-data; name="payload" { "type": "PACKAGE", "status": "DRAFT", "roles": [ { "id": "Signer1", "type": "SIGNER", "signers": [ { "email": "[email protected]", "firstName": "John", "lastName": "Smith", "id": "Signer1" } ] }, { "id": "Signer2", "type": "SIGNER", "signers": [ { "email": "[email protected]", "firstName": "Patty", "lastName": "Galant", "id": "Signer2" } ] } ], "name": "Mortgage Loan Application #1143216218", "documents": [ { "fields": [ { "value": "[email protected]", "name": "applicant_email" }, { "value": "John Smith", "name": "applicant_name" }, { "value": 1143216218, "name": "application_number" } ], "extract": true, "name": "Mortgage Loan Agreement", "id": "loan", "data": { "esl_doc_extract_type": 1 } }, { "fields": [ { "value": "[email protected]", "name": "coapplicant_email" }, { "value": "Patty Galant", "name": "coapplicant_name" }, { "value": 1143216218, "name": "application_number" } ], "extract": true, "name": "Appraisal Form", "id": "loan2", "data": { "esl_doc_extract_type": 1 } } ] } ------WebKitFormBoundary7MA4YWxkTrZu0gW--
Once the package has been created, you can now configure the Document Visibility. In this example, the Applicant will only view and sign the Mortgage Loan form in the Signer Experience. The Appraiser will view and sign both Mortgage Loan form and Home Appraisal form. To setup Document Visibility, you will need to make a:
POST https://sandbox.esignlive.com/api/packages/{packageId}/documents/visibility
With the following payload:
{ "configurations": [ { "documentUid": "loan", "roleUids": [ "Signer1" ] }, { "documentUid": "loan2", "roleUids": [ "Signer2" ] } ] }
Once Document Visibility has been setup, you can now send your package.
PUT https://sandbox.esignlive.com/api/packages/{packageId} { "status": "SENT" }
With OneSpan Sign, you can fully customize all emails sent by the system to end-users and administrators. Each email template can be customized for each language supported by OneSpan Sign. Note that customizing your email templates must be done with help from our Technical Support team ([email protected]; 1-855-MYESIGN).
You also have the ability to customize the OneSpan Sign Signer Experience. This allows you to seamlessly integrate the signing process within your own web application. OneSpan Sign provides various options for customizing the look and feel of the Signer Experience.
A notification has been sent to your email address! Please check your email to sign documents.
What’s Next?
Continue to discover more about OneSpan Sign in the following ways: