OneSpan Sign How To: Creating a Simple PHP Web Application

PHP is a server-side scripting language designed mainly for web development. It is one of the most predominant scripting languages used by web developers. The main reasons for its popularity are the following:
- Easy to learn
- Well documented
- Easy to use
PHP has by far the smallest learning curve. All you need to get started is a few PHP tags inside an HTML file and see the result. Next, PHP is well documented. You can find tons of examples on PHP’s official site or by simply doing an online search. This is due to the vast community support that PHP has. Lastly, it is particularly easy to use. Unlike most solutions such Java and C++, PHP code doesn’t need to be compiled. You can simply write your script and refresh your browser to see the results. In this blog, I will show you how to create a simple PHP web application in which your user is required to fill-out a form and subsequently sign a sample contract using OneSpan Sign.
Requirements
Before diving into the code, you will need to setup your environment to create your PHP web application. For this blog, all you need is a web server with a PHP interpreter and a text editor.
Downloading XAMPP I’ll be using XAMPP, which is a free open-source cross-platform web server with PHP and PERL interpreters. It’s simple, lightweight and allows you to test your scripts locally. You can get XAMPP from the link below.
Downloading a Text Editor
You will also need a text editor. For this blog, I will use Sublime Text. You can download a free copy from the link below.
Installing and Configuring XAMPP
After downloading XAMPP, go ahead and run the executable file. If you have an antivirus program running on your computer, you might be prompted if you want to continue with the installation. Click "Yes". It is recommended that you turn off your antivirus when running XAMPP.

Next, you will be presented with the XAMPP welcome page. Click "Next". Then, you will be asked to select the components you wish to install. For the purposes of this blog, you will only need the Apache server and PHP as the programming language.

After clicking "Next", you will be asked to select a folder to install XAMPP. In my example, I chose to install it in the default directory (e.g. C:\xampp).

From here, you can keep clicking on "Next" until the installation is complete. Finally, click on "Finish", which will launch the XAMPP Control Panel.

The default port number used by XAMPP is 80. In my example, I changed the port number to "1234". This step is purely optional. If you choose to leave it 80, your url will be "localhost:80". To change the port number, click on "Config" in the Control Panel and select "Apache (httpd.conf)". In the configuration file, change the following:
Listen 80
ServerName localhost:80
Replace them by:
Listen 1234
ServerName localhost:1234
Save your changes and close the configuration file. You can now run Apache by clicking on "Start" in the Control Panel.

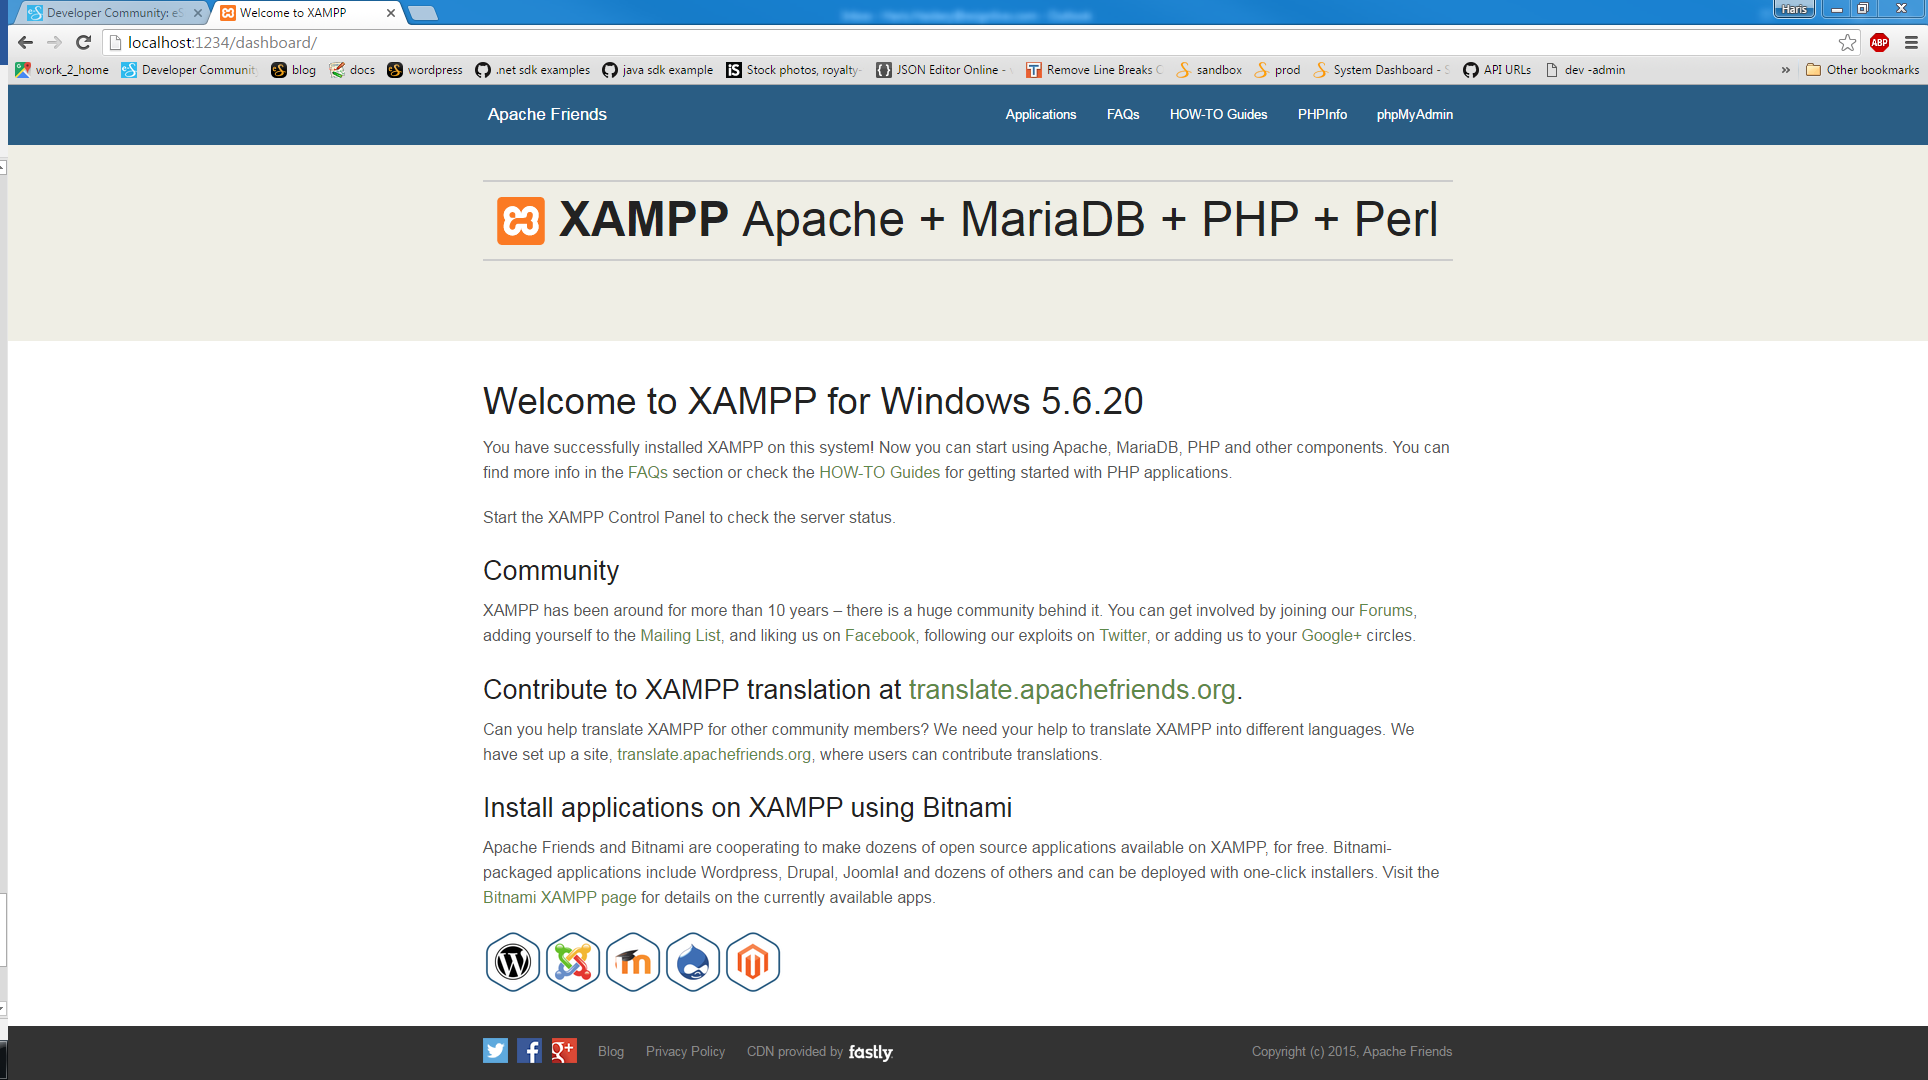
In your browser, enter "localhost:1234". If you see the screen below, this means you’ve successfully installed XAMPP on your computer.
You can also test whether XAMPP has installed PHP successfully with a simple test. Open Sublime Text and type the following:
<?php echo ‘Hello World!’; ?>
Save this file as "test.php" in "C:\xampp\htdocs". Then, Navigate to "localhost:1234/test.php". You should see the "Hello Word!" message:

The Code
We are now ready to dive into the code. Create a new folder under "C:\xampp\htdocs\" and name it "esignlive". The first step is to create your HTML form. In Sublime Text, create a new file and copy the code below:
<!DOCTYPE html>
<html>
<head>
<meta http-equiv="Content-Type" content="text/html; charset=UTF-8">
<title>Form</title>
</head>
<body>
<h3>Please fill-out the following form:</h3>
<div style="border:1px solid #D0D0D0;width:400px;padding:10px;">

    <form method = "POST" action="thankyou.php">
        First Name: <input type="text" name="firstName" value="">
        <br>
        Last Name : <input type="text" name="lastName" value="">
        <br>
        Email Address : <input type="text" name="emailAddress" value="">
        <br>
        Company : <input type="text" name="company" value="">
        <br>
        Address : <input type="text" name="address" value="">
        <br>
        City : <input type="text" name="city" value="">
        <br>
        State : <input type="text" name="state" value="">
        <br>
        Zip : <input type="text" name="zip" value="">
        <br>
        Country : <input type="text" name="country" value="">
        <br>
        Phone Number : <input type="text" name="phoneNumber" value="">
        <br>
        Policy Number : <input type="text" name="policyNumber" value="">
        <br>
        <hr>
        <input type="submit" value="Submit">
    </form>
</div>

</body>
</html>
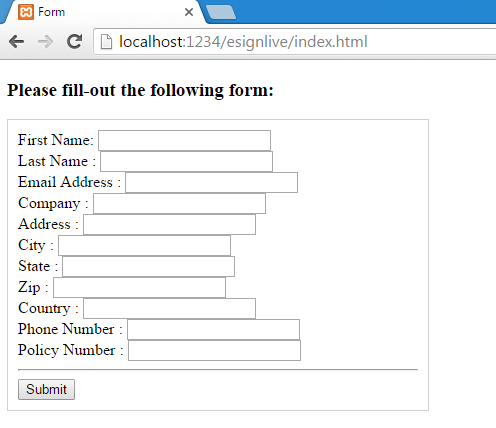
As you can see from the HTML code above, on submit, the form-data will be sent to a file named "thankyou.php" (will be created shortly). Save your file as "index.html" in your "OneSpan Sign" folder you just created (e.g. C:\xampp\htdocs\esignlive). In your browser, if you browse to localhost:1234/esignlive/index.html, you should see the following:
If you fill-out the form and click on "Submit", you will get a 404 error since we haven’t created a "thankyou.php" file yet. Let’s go ahead and do so.
In Sublime Text, create a new file and copy the following:
<?php

require("ESLPackageCreation.php");

$package = new ESLPackageCreation();

$packageId = $package->buildPackage($_POST['firstName'], $_POST['lastName'], $_POST['emailAddress']);

$response = $package->buildDocument($packageId, $_POST['firstName'], $_POST['lastName'], $_POST['address'], $_POST['city'], $_POST['state'], $_POST['zip'], $_POST['country'], $_POST['phoneNumber'], $_POST['emailAddress'], $_POST['company'], $_POST['policyNumber']);

$package->buildSend($packageId);

$package->buildSign($packageId);

$token = $package->buildToken($packageId);

?>

<html>
<head>
<title>Form Processing</title>
</head>
<body>
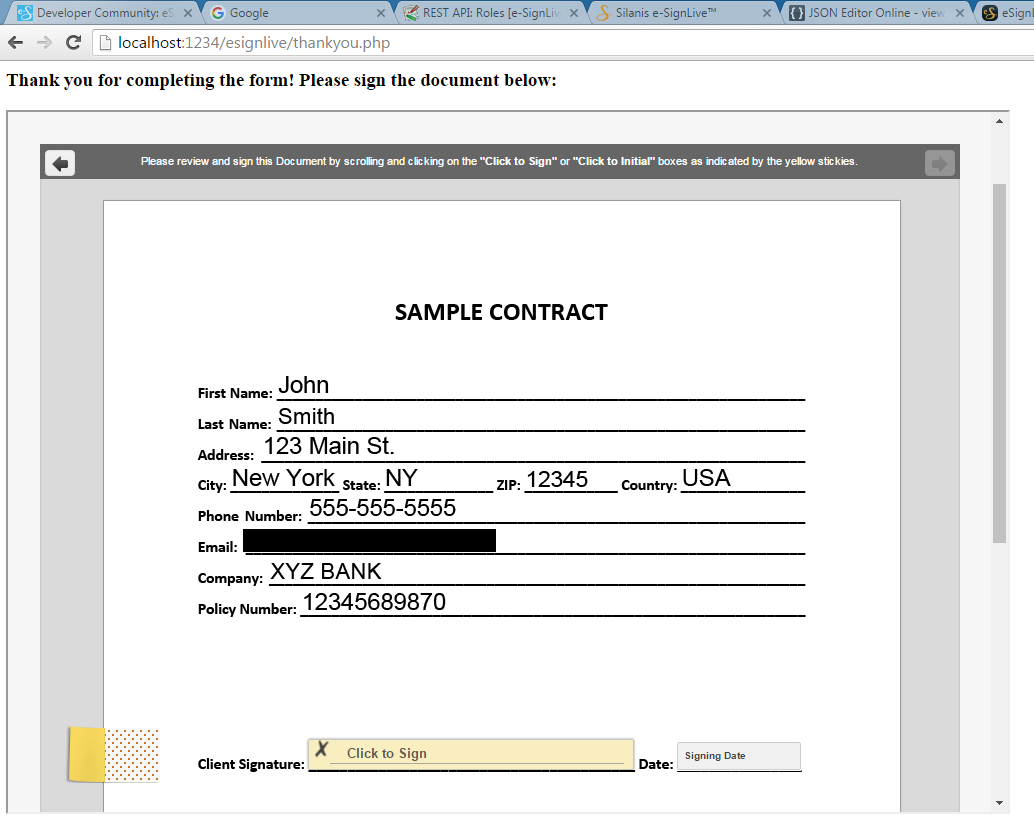
  <h3>Thank you for completing the form! Please sign the document below:</h3>

   <iframe src="https://sandbox.esignlive.com/access?sessionToken=<?php echo $token['value']; ?>" width="1000" height="700"></iframe>

</body>
</html>
Save this file as "thankyou.php" in your "OneSpan Sign" folder. Let’s break down the code above. The first two lines imports the "ESLPackageCreation.php" file (will be created shortly) and instantiates a new class.
require("ESLPackageCreation.php");
$package = new ESLPackageCreation();
The next couple of lines is where we pass the form-data as parameters to the methods of the "ESLPackageCreation" class to create and send a package, and subsequently build a signer authentication token.
<?php

define("MULTIPART_BOUNDARY", "----WebKitFormBoundary7MA4YWxkTrZu0gW");

class ESLPackageCreation

{
	//Define api key and api url
	private $url = "https://sandbox.esignlive.com/api";
	private $key = "your_api_key";
	private $packageAppend = "/packages/";
	private $tokenAppend = "/signerAuthenticationTokens/";

	//Constructor method for ESLPackageCreation
	public function __construct()
	{

	}

	//Create package
	public function buildPackage($firstName, $lastName, $email)
	{
		$build = array(
			'type' => 'PACKAGE',
			'status' => 'DRAFT',
			'roles' => array(
				array(
					'id' => 'Signer1',
					'type' => 'SIGNER',
					'signers' => array(
						array(
							'email' => $email,
							'firstName' => $firstName,
							'lastName' => $lastName,
							'id' => 'Signer1',
						)
					) ,
				) ,
				array(
					'id' => 'Sender1',
					'type' => 'SIGNER',
					'signers' => array(
						array(
							'email' => '[email protected]',
							'firstName' => 'John',
							'lastName' => 'Smith',
							'id' => 'Sender1',
						)
					) ,
				) ,
			) ,
			'name' => 'PHP Application Example',
		);
		$packageJSON = json_encode($build);
		$packageId = json_decode($this->sendRequest($this->packageAppend, $packageJSON, NULL, NULL), true);
		return $packageId;
	}

	//Upload document
	public function buildDocument($packageId, $firstName, $lastName, $address, $city, $state, $zip, $country, $phoneNumber, $emailAddress, $company, $policyNumber)
	{
		$build = array(
			'fields' => array(
				array(
					'value' => $firstName,
					'name' => 'first_name',
				) ,
				array(
					'value' => $lastName,
					'name' => 'last_name',
				) ,
				array(
					'value' => $address,
					'name' => 'address',
				) ,
				array(
					'value' => $city,
					'name' => 'city',
				) ,
				array(
					'value' => $state,
					'name' => 'state',
				) ,
				array(
					'value' => $zip,
					'name' => 'zip',
				) ,
				array(
					'value' => $country,
					'name' => 'country',
				) ,
				array(
					'value' => $phoneNumber,
					'name' => 'phone_number',
				) ,
				array(
					'value' => $emailAddress,
					'name' => 'email',
				) ,
				array(
					'value' => $company,
					'name' => 'company',
				) ,
				array(
					'value' => $policyNumber,
					'name' => 'policy_number',
				) ,
			) ,
			'extract' => true,
			'name' => 'Sample Contract',
			'id' => 'contract'
		);

		$documentJSON = json_encode($build);

		$postdata = "--" . MULTIPART_BOUNDARY . "\r\n";
	    $postdata .= "Content-Disposition: form-data; name=\"file\"; filename=\"sample_contract2.pdf\"\r\n";
	    $postdata .= "Content-Type: application/pdf" . "\r\n\r\n";
	    $postdata .= file_get_contents("documents\sample_contract2.pdf");
	    $postdata .= "\r\n\r\n";
	    $postdata .= "--" . MULTIPART_BOUNDARY . "\r\n";
	    $postdata .= "Content-Disposition: form-data; name=\"payload\"\r\n\r\n";
	    $postdata .= $documentJSON;
	    $postdata .= "\r\n\r\n";
	    $postdata .= "--" . MULTIPART_BOUNDARY . "--\r\n";

		$status = $this->sendRequest($this->packageAppend . $packageId['id'] . '/documents', $documentJSON, $postdata, 'multipart/form-data; boundary=' . MULTIPART_BOUNDARY);
		return $status;
	}

	//Send Package
	public function buildSend($packageId)
	{
		$build = array(
			'status' => 'SENT'
		);
		$sendJSON = json_encode($build);
		$this->sendRequest($this->packageAppend . $packageId['id'], $sendJSON, NULL, 'application/json');
		return NULL;
	}

	//Sender signs consent and contract documents
	public function buildSign($packageId)
	{
		$build = array(
			'documents' => array(
				array(
					'id' => 'default-consent',
					'name' => 'Electronic Disclosures and Signatures Consent'
				) ,
				array(
					'id' => 'contract',
					'name' => 'Sample Contract'
				)
			)
		);
		$signJSON = json_encode($build);
		$signatureAppend = $this->packageAppend . $packageId['id'] . '/documents/signed_documents';
		$this->sendRequest($signatureAppend, $signJSON, NULL, 'application/json');
		return NULL;
	}

	//Get a session token
	public function buildToken($packageId)
	{
		$build = array(
			'packageId' => $packageId['id'],
			'signerId' => 'Signer1'
		);
		$tokenJSON = json_encode($build);
		$token = json_decode($this->sendRequest($this->tokenAppend, $tokenJSON, NULL, 'application/json'), true);
		return $token;
	}

	//cURL function to send requests to eSignLive
	private function sendRequest($type, $json, $document, $contentType)
	{
		if (is_null($document) && is_null($contentType))
		{
			$postfields = array(
				"payload" => $json
			);
		}
		else if (is_null($document) && !is_null($contentType))
		{
			$postfields = $json;
		}
		else
		{
			$postfields = $document;
		}

		$headerOptions = array(
			'Authorization: Basic ' . $this->key,
			'Accept: application/json,application/zip,text/html,application/xhtml+xml,application/xml;q=0.9,image/webp,*/*;q=0.8'
		);
		if (!is_null($contentType))
		{
			$headerOptions[] = "Content-Type: $contentType";
		}

		$ch = curl_init();
		curl_setopt($ch, CURLOPT_URL, $this->url . $type);
		curl_setopt($ch, CURLOPT_POST, true);
		curl_setopt($ch, CURLOPT_FAILONERROR, true);
		curl_setopt($ch, CURLOPT_FOLLOWLOCATION, true);
		curl_setopt($ch, CURLOPT_RETURNTRANSFER, true);
		curl_setopt($ch, CURLOPT_SSL_VERIFYHOST, false);
		curl_setopt($ch, CURLOPT_SSL_VERIFYPEER, false);

		if (!is_null($postfields))
		{
			curl_setopt($ch, CURLOPT_POSTFIELDS, $postfields);
			if (!is_array($postfields))
			{
				$headerOptions[] = 'Content-Length: ' . strlen($postfields);
			}
		}

		curl_setopt($ch, CURLOPT_HTTPHEADER, $headerOptions);
		$response = curl_exec($ch);
		$err = curl_error($ch);
		curl_close($ch);

		if ($err)
		{
			return $err;
		}
		else
		{
			return $response;
		};
	}
}

?>
In the code above, each method creates the appropriate JSON payload from array using json_encode(). This PHP function translates the data passed to it to a JSON string, which can then be used to make a cURL request to OneSpan Sign. Also, make sure to replace the api key placeholder with your own value.
Note: If you are on a Mac or Linux environment, please use forward slashes when specifying file path locations.
Running Your Project
You are now ready to run your PHP web application. In your browser, enter localhost:1234/esignlive/index.html. Go ahead and fill-out some sample information and click on "Submit".
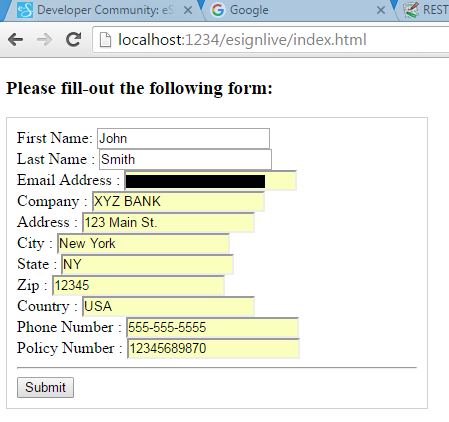
You should be redirected to the OneSpan Sign ceremony. After accepting the default consent form, you will be presented with the sample contract fields populated with the data you entered in the form and the contract ready to be signed.
If you have questions regarding this blog or anything else concerning integrating OneSpan Sign into your application, visit the developer community forums: https://developer.esignlive.com.
That's it from me. Thank you for reading! If you found this post helpful, please share it on Facebook, Twitter, or LinkedIn.
Haris Haidary
Junior Technical Evangelist
LinkedIn | Twitter

