OneSpan Sign Developer: Designer Customization and Integration – Part 3
In last two blogs, we’ve walked through basic aspects of customization and integration with Designer Session in Part 1, and then focused on Designer Profiles and how to use banners in Part 2.
The third part in this ongoing blog series will include a demo project showing how to develop with a Designer page in a common workflow. We’ll explain how you can handle the completion event and facilitate the whole process from package creation to embedded signing.
Designer Customization Workflow in OneSpan Sign
Step1:
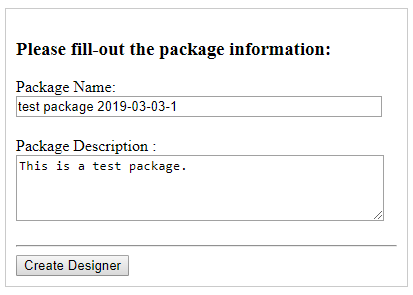
We will provide with a HTML form prompting the user to input basic package information before clicking the “Create Designer” button. The front-end code will request our back-end to create a package with the specified information and return with a designer link.
Step 2:
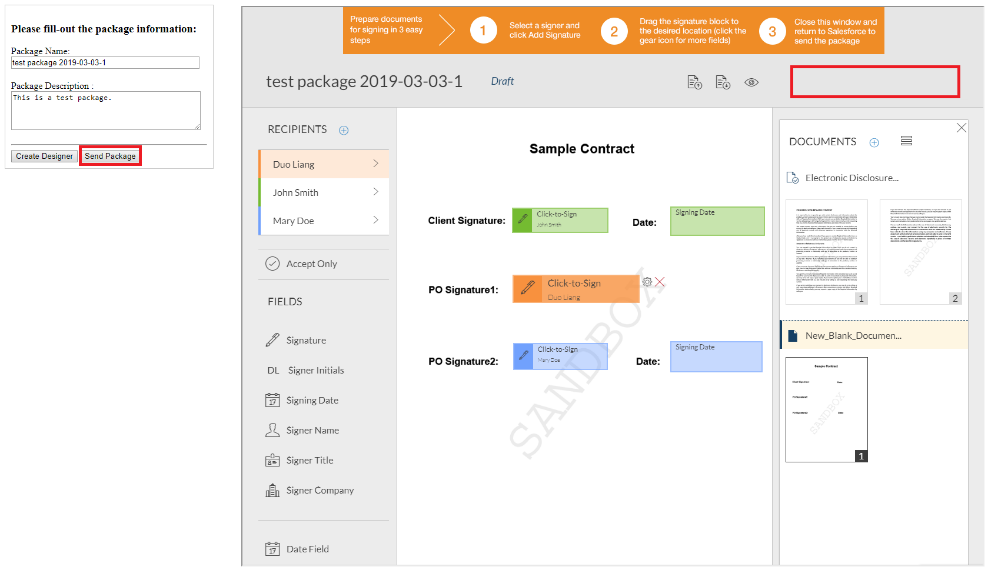
Once the designer URL is returned, we can create an iFrame on the right side of the screen. The user can then upload documents and add recipients here.
Note that we have removed the “Send” button at the designer page. Instead, a custom button was added outside the iFrame. This is a recommended practice when you need to trigger the completion event or send activity of your package, because the default send button won’t return to you any kind front-end notification.
Another commonly seen practice is to embed the designer into a pop-up model and provide an “X” button at the right top corner.
Once the user clicks the customized “Send Package” button, our front-end code will again request our back-end to validate and send the package and return a signing URL link.
Step 3:
After the package is validated, it will be sent and an in-person signing ceremony link will be return to HTML page.
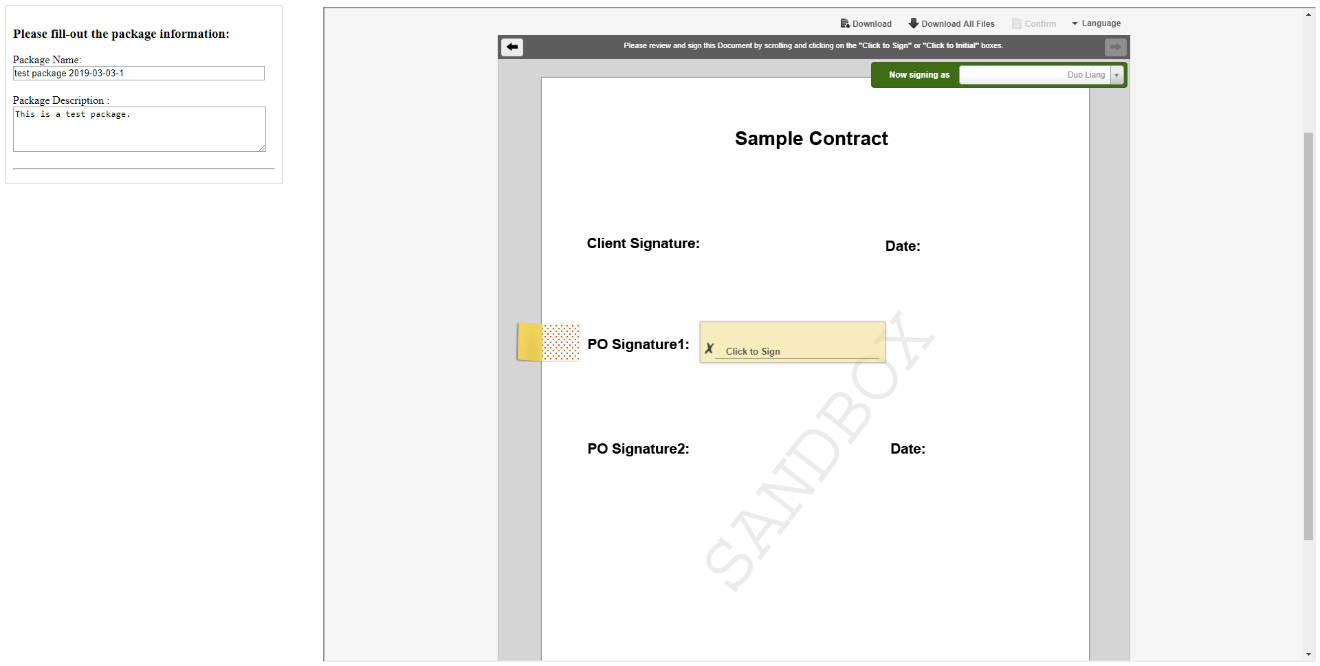
THE CODE
You can find the demo code in our code share, which was written in PHP and with REST method. If it’s your first time working with PHP, refer to this blog “Creating a Simple PHP Web Application” to learn how to run a simple PHP web application.
To adjust to your own account information, just change the corresponding parameters in file “ESLPackageCreation.php”. The starting point of the project is the “index.html” file.
RELATED API
In step 1, we used the API below to create an in-person-signing package without any documents and signers. If you are unfamiliar with basic package creation function, check our Quick Start Guide.
HTTP Request
POST /api/packages
HTTP Headers
Authorization: Basic api_key
Accept: application/json
Request Payload
{
	“type”:”PACKAGE”,
	 “status” : “DRAFT”,
	 “name” : {pkgName},
	 “description” : {pkgDesc},
	 “settings” : {
		 “ceremony” : {
			 “inPerson” : “true”
		}
	}
}
Response Payload
{
    "id": "9sKhW-h-qS9m6Ho3zRv3n2a-rkI="
}
In step2, document uploading and signer adding were done entirely in the Designer page. You can also collect and inject this information in step 1.
To send a package, refer to our “Modify Status of a Package” Guide.
In step 3, because it is an in-person signing, we created a signer authentication token for our sender using the API below:
HTTP Request
POST /api/authenticationTokens/signer/multiUse
HTTP Headers
Accept: application/json
Content-Type: application/json
Authorization: Basic api_key
Request Payload
{
    "packageId": "5vjLRY5MWrDJ6MzRAEyCKOy5IH0=",
    "signerId": "8b734331-bc5b-4843-9784-d4ece4b7dc22"
}
Response Payload
{
   "packageId":"5vjLRY5MWrDJ6MzRAEyCKOy5IH0=",
   "signerId":"8b734331-bc5b-4843-9784-d4ece4b7dc22",
   "value":"ZDNmMDNiNGUtNGYxOC00YWZiLTkwMmUtNWE5YmIwZTRjZDg1"
}
Note: In an in-person signing scenario, the signing ceremony will start with the signer used to generate the authentication token.
Through this blog, we’ve completed a very basic integration process from package information collection to package creation and design. From there, we embedded the signing ceremony and explained how to manually trigger the completion event to let your application take control of the process once more.
If you have any questions regarding this blog or anything else concerning integrating OneSpan Sign into your application, visit the Developer Community Forums.
